This Cyrus 8 integrated amplifier has developed a fault which renders it useless.
The sound is loud and distorted. Volume control is ineffective. It is bit modern for me, with all those Integrated circuits and suface mounted components. My comfort zone is the all analogue Cyrus Two. However, it belongs to my cousin Nick. He’s gutted! So, let’s see what we can do together to get it up and running.
Nick had done some intital tests and established that he could get sound out of it by connecting an mp3 player to any of the inputs. The input selection worked as expected, but with awful distorted sound, irrespective of which input is used. Turning down the volume of the input signal improved sound quality considerably. The volume control on the amp is ineffective, despite the display lights behaving as they should. The other front panel controls all seem to do the right thing and the remote control works. This suggests that the digital circuitry is doing what it should.
Online research suggests that these units are prone to failure of one or both of the large integrated circuits in the pre-amp section. The first, an LC78211, is a digitally controlled audio switch and is used for input selection. We have seen this working. The second, an LM1972 volume control chip, is the source of our problem.
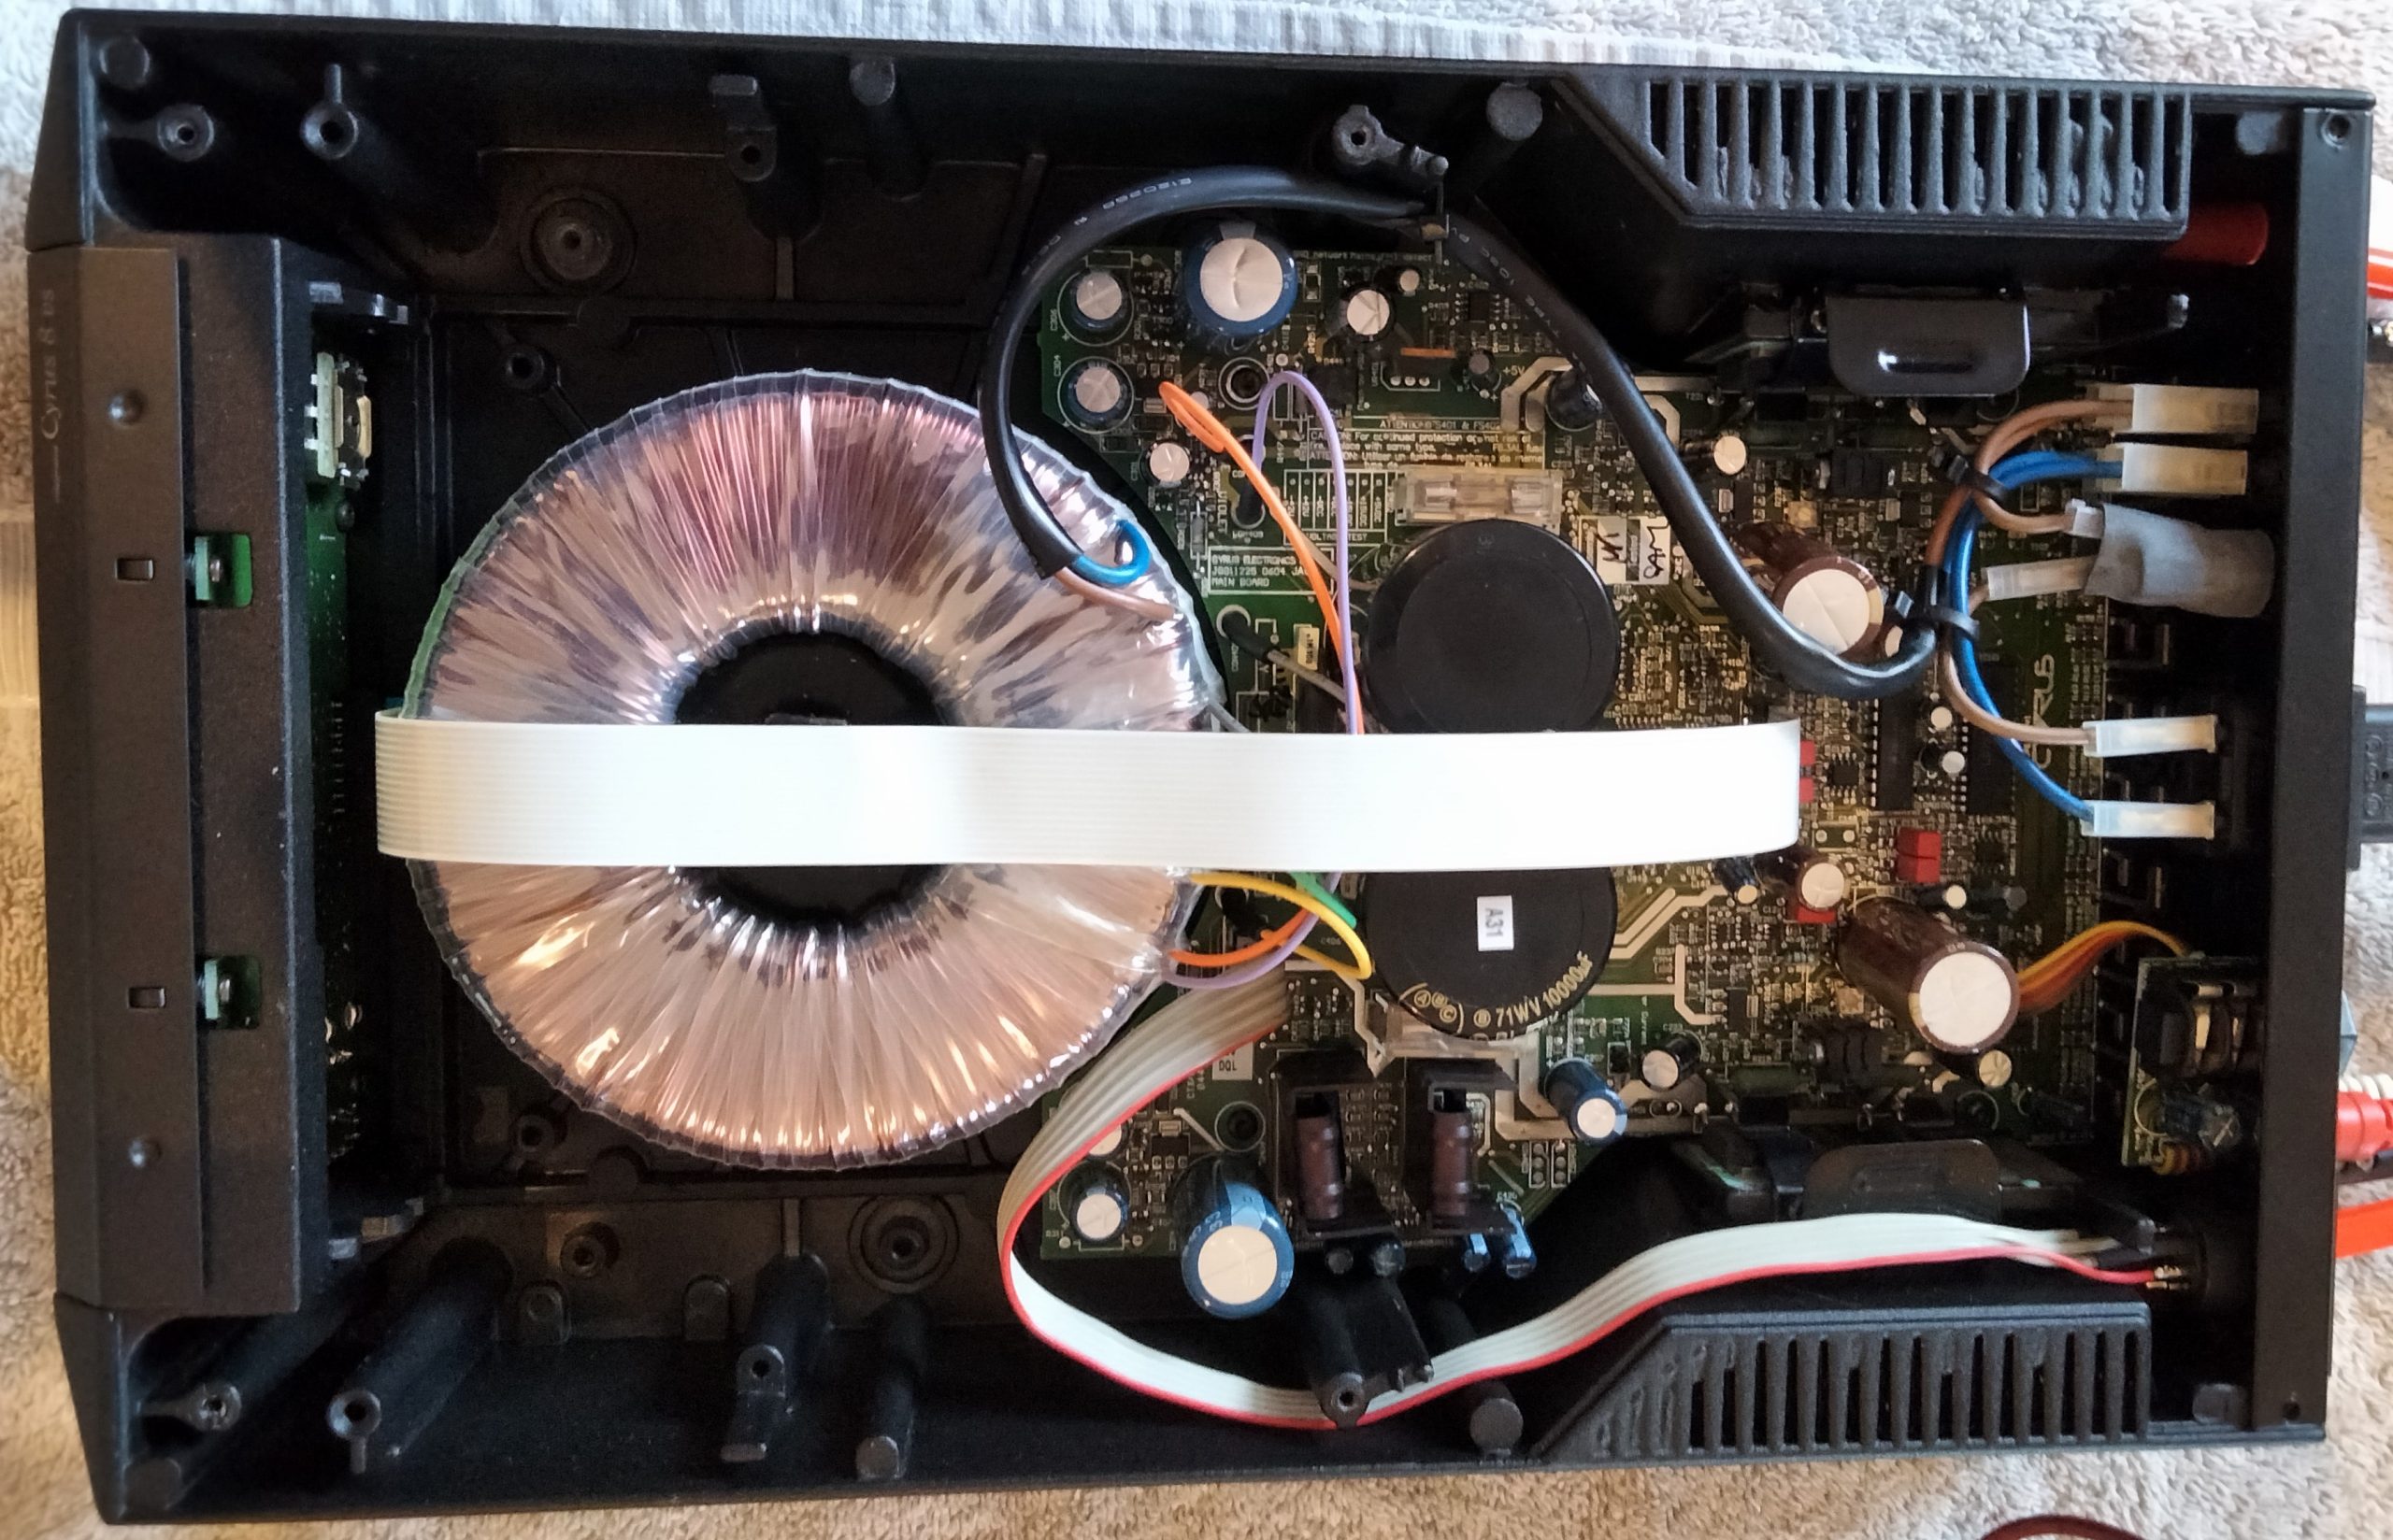
With the amp on my workbench we repeated Nicks investigations and I had a poke about with a ‘scope. The suspected IC’s are located towards the back of the amplifier, just at the end of the white ribbon cable.
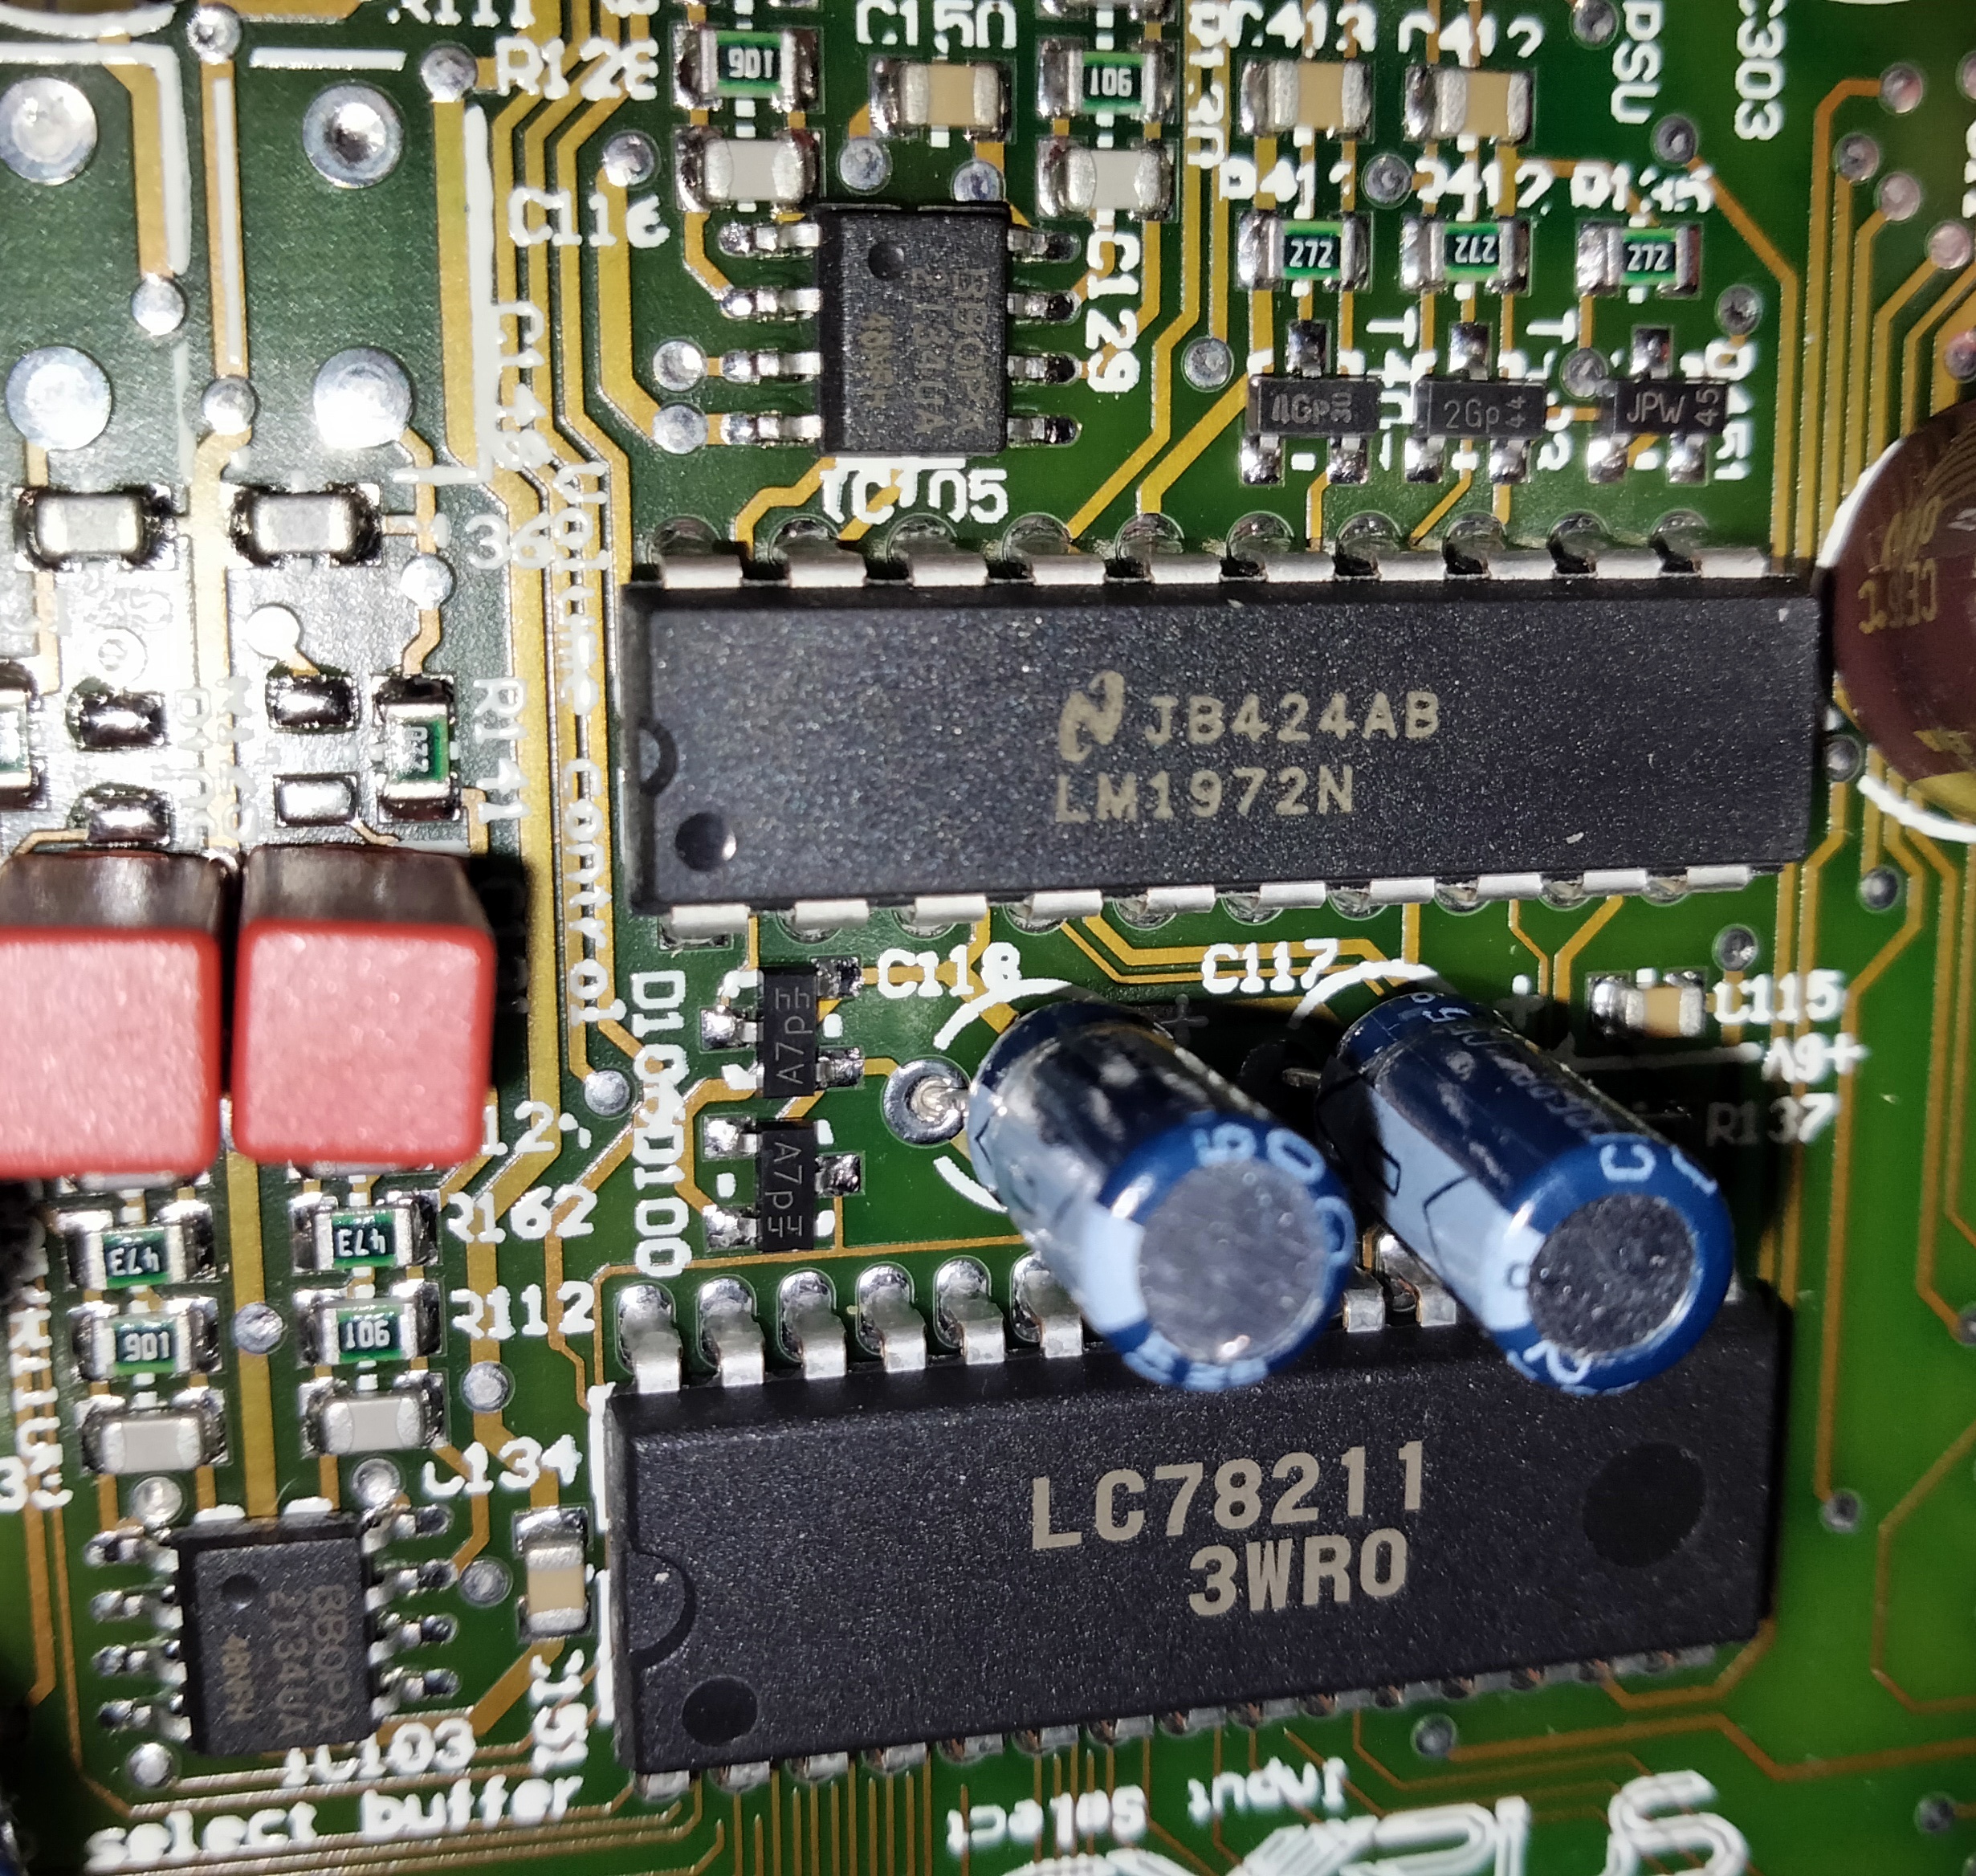
The LM1972 is probably dead and must be replaced. Removing it without damaging anything else is the biggest challenge of this job. The priority is to not damage the PCB or any of the surrounding components. The LM1972 is of no concern now, so we don’t need to worry about damaging it any further.
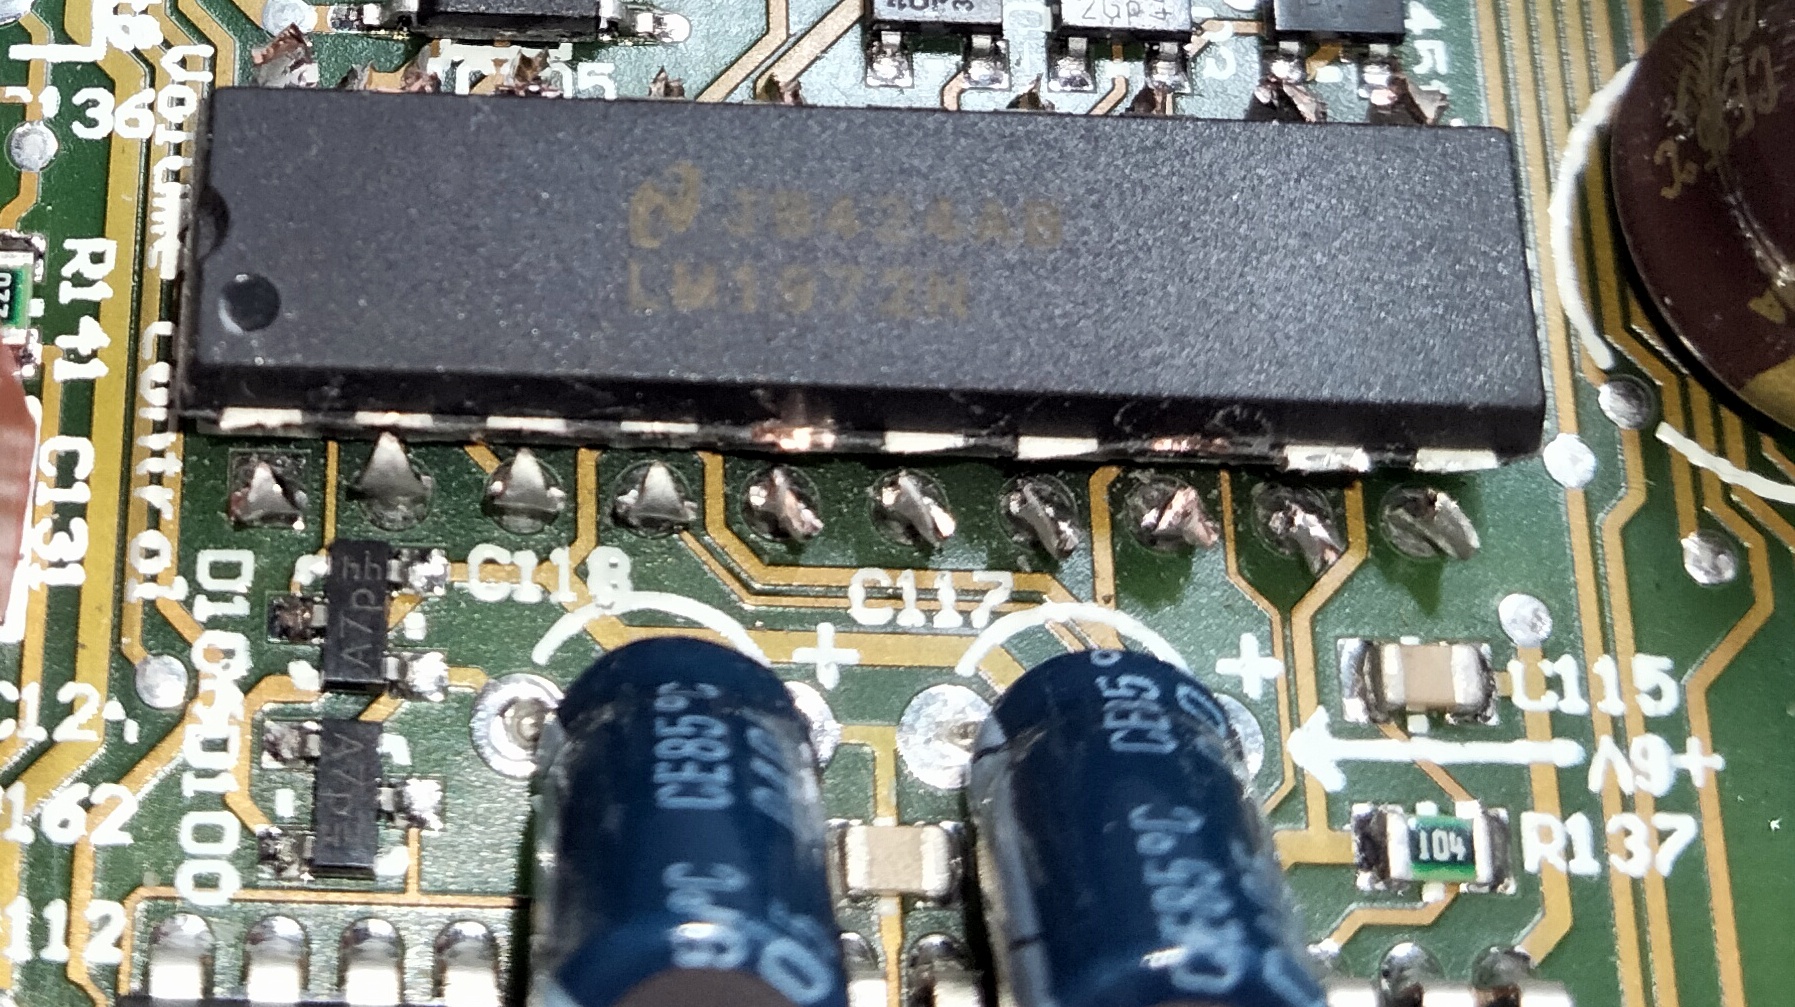
Capacitors C117 and C118 are close and need to be bent away. Now we have access and can use a new, very sharp, pair of cutters to cut the legs from the IC. The main body of the IC can then be removed and disguarded.
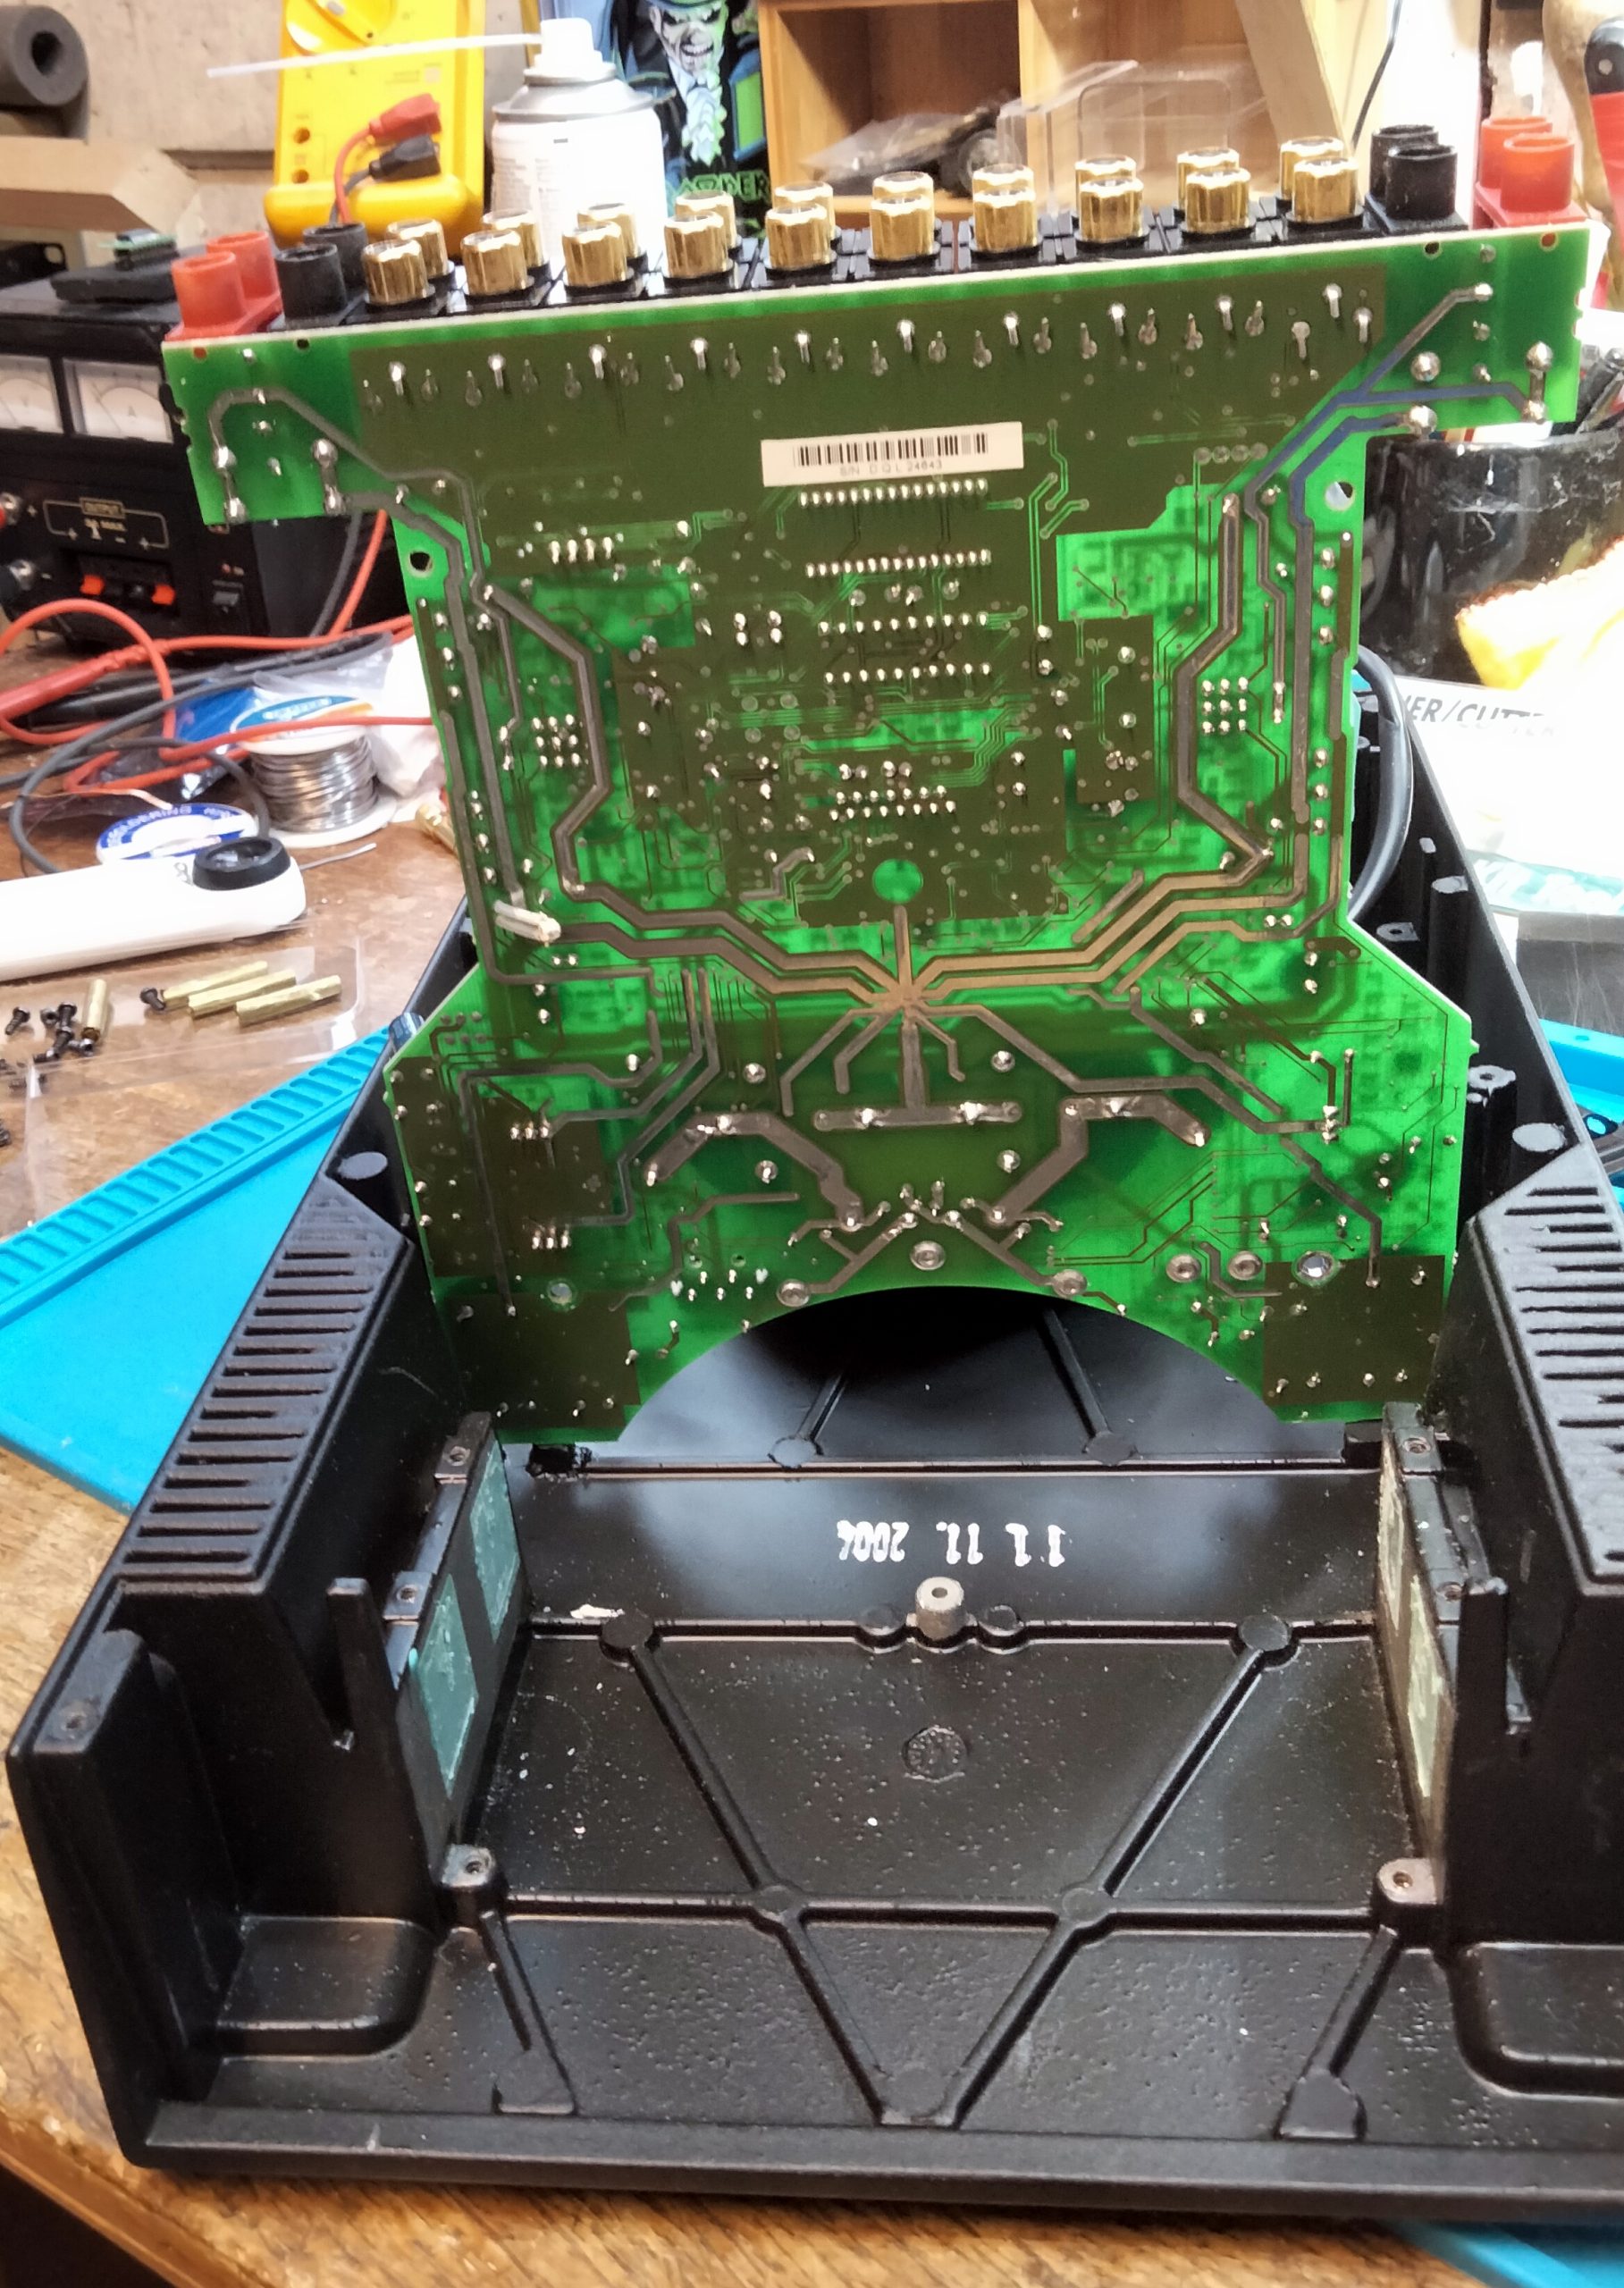
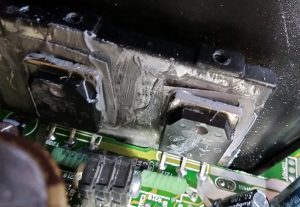
To remove the pins we need access to the bottom of the PCB. In this amplifier dismantling is it’s not too bad. The board is held down by half a dozen or so screws. The output power transistors need to be seperated from the main chassis, which is also the heatsink. In this case they were stuck rock solid by old thermal grease and had to be coaxed free with a knife. Now the PCB could be lifted up, giving simultaneous access to both sides.
Removing the old IC pins is a three handed job. That’s OK though because between us we have four. Nick and I took our time. We got everything out without damage and only half filled the swear box.
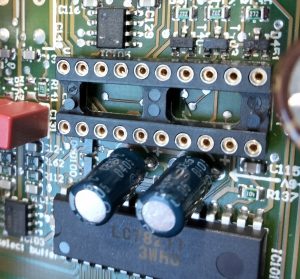
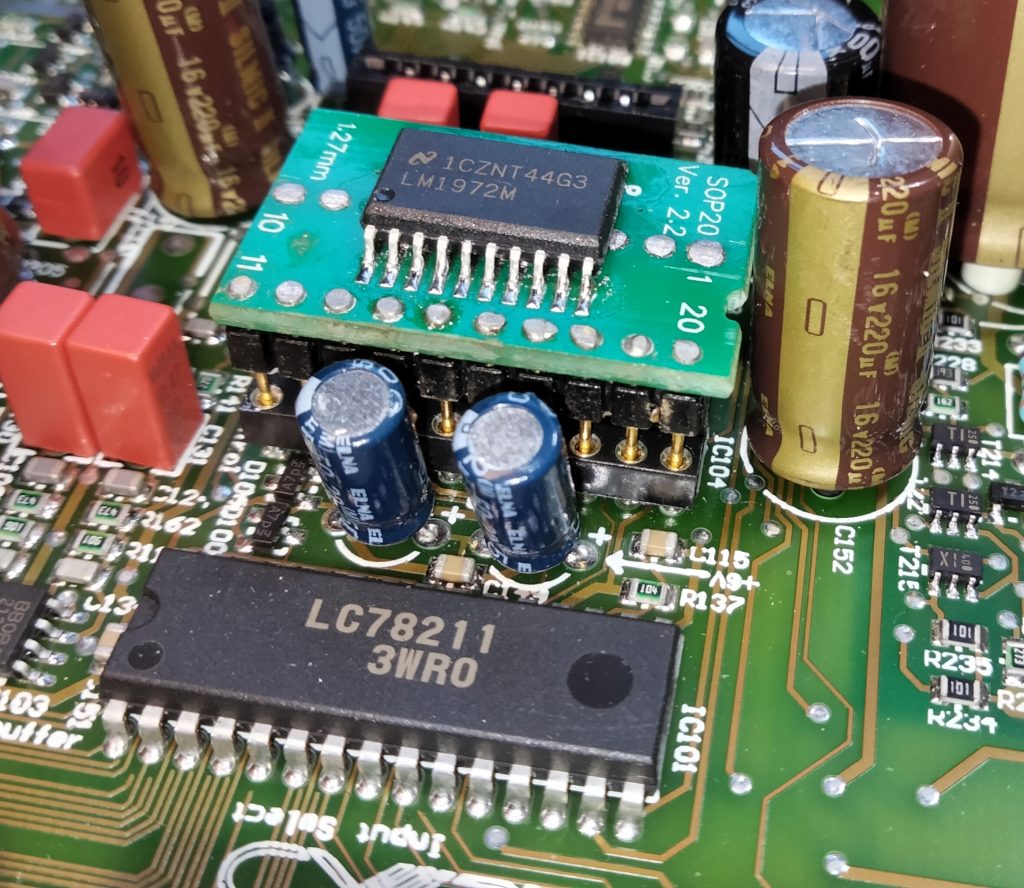
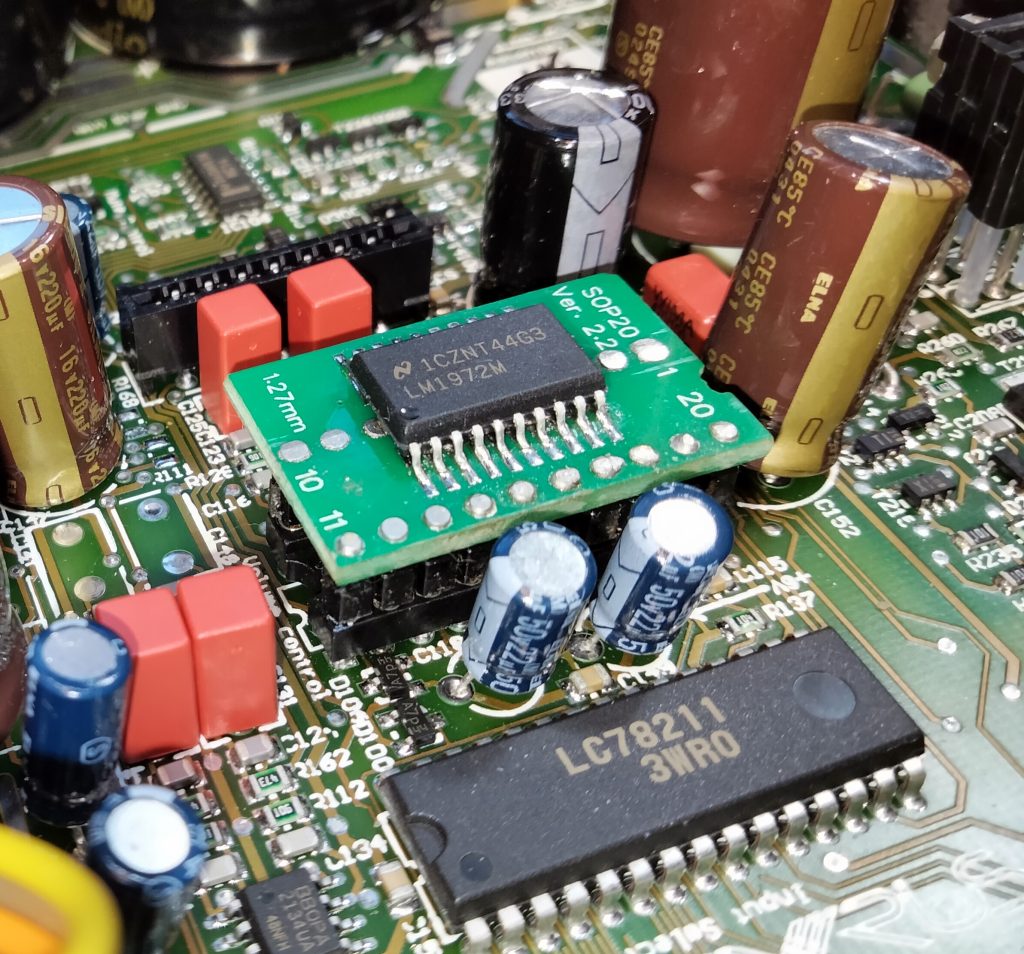
That was a lot of work just to get a chip out. We certaily don’t want to do that again. So, a good quality socket was fitted. Spare parts availability isn’t great so having the option to easily change it again is an attractive proposition.
The amp can now be re assembled. Screw the PCB back in and replace the back panel. Be sure to pay attention to securing the transistors to the heatsinks. Use insulating washers and themal grease. Get this wrong and you will soon have a much more expensive repair on your hands.
The LM1972 was made in a Dual in line package (DIP package). It was later produced in an SOIC (Small Outline Integrated Circuit) as well. Then they stopped making the DIP version which we need.
We have a couple of options here. One is to try and find an LM1972 in a DIP package. A few years ago this would have been worth a go. However, now counterfeit chips are common. We could easily spend a lot of money on something that just doesn’t work. Not worth the risk when the SOIC version is still in production and can be bought new from reputable suppliers for about £5. Shame the SOIC version won’t won’t physically fit here.
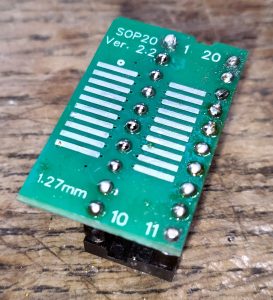
The SOIC won’t directly fit here, but a SOIC to DIL converter PCB can be had for a couple of quid. Add some header pins and we can have a solution for less than a tenner.
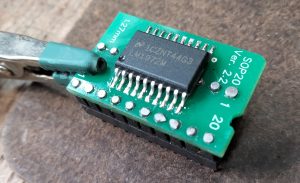
I have never done surface mount before. I invested in a hot air workstation and a practice kit for surface mount soldering. After a couple of hours I was confident enough to have a go on something important.
Those electrolytic capacitors between the chips are in the way of where hte converter board should go. The simple solution is to mount the LM1972 to the board rotated through 180 degrees. Then the board can be fitted into the Cyrus similarly rotated. This corrects the connections and results in an offset which clears the capacitors.
I survived my first foray into sufrace mount soldering and Everything worked as required. A successful repair.
Nick was a happy man when he left with his pride and joy back to life.
I haven’t heard from him for a couple of weeks. I bet his neighbours have though!