I’ve always fancied the idea of a linear tracking turntable, but baulked at the cost and complexity.

I got his one in a sorry state. “It needs some attention” he said. It was cheap, and I was up for the challenge. So how did I get on ?
Most HiFi turntables use traditional pivoting tonearms. This is in contrast to the mastering lathe used as part of the record creation process. The lathe moves it’s cutting head in a straight line from the edge of the record towards the centre as it created the sound groove. During playback a pivoting tonearm moves the stylus in an arc over the record as it plays. This means that, for the most part, the playback stylus is not tangential to the groove. This leads to distortion, deficiencies in channel separation and mis-tracking. Linear tracking turntables mimic the movement of the cutting lathe, so reduce or eliminate these problems. In practice though the extra complexity of a linear tracking mechanism causes more problems than it solves, unless you throw a lot of money at it. Radial Pivoting Tonearms still rule the roost, unless you have very deep pockets indeed.
The early 1980s produced quite a few linear trackers. Bang and Olufsen made some very posh ones. Others were cheap and gimmicky. Occupying the middle ground with some lovely machines was Technics. That’s what I have here. I have high expectations from the company that brought us the SL1200 Turntable with its magnificent direct drive platter Popular with DJ’s and HiFi enthusiasts equally
The SL-L1 we have here is one of the earlier Technics linear trackers. Later models reduced cost (Plastic replaced metal) reduced width (to match the popular 300 mm sized systems of the time) and added fancy automatic control. I had chanced on the sweet spot for me. Built like a tank, direct drive, wide enough to sit comfortably with the rest of my system and simple enough to be a pleasure to operate.
It looks complicated, but if you break it down. It’s not so bad. The main parts are the tonearm assembly and the arm drive motor. The two are linked by a “drive rope”. Some fancy sensors and a microcomputer make these things play nice with each other.
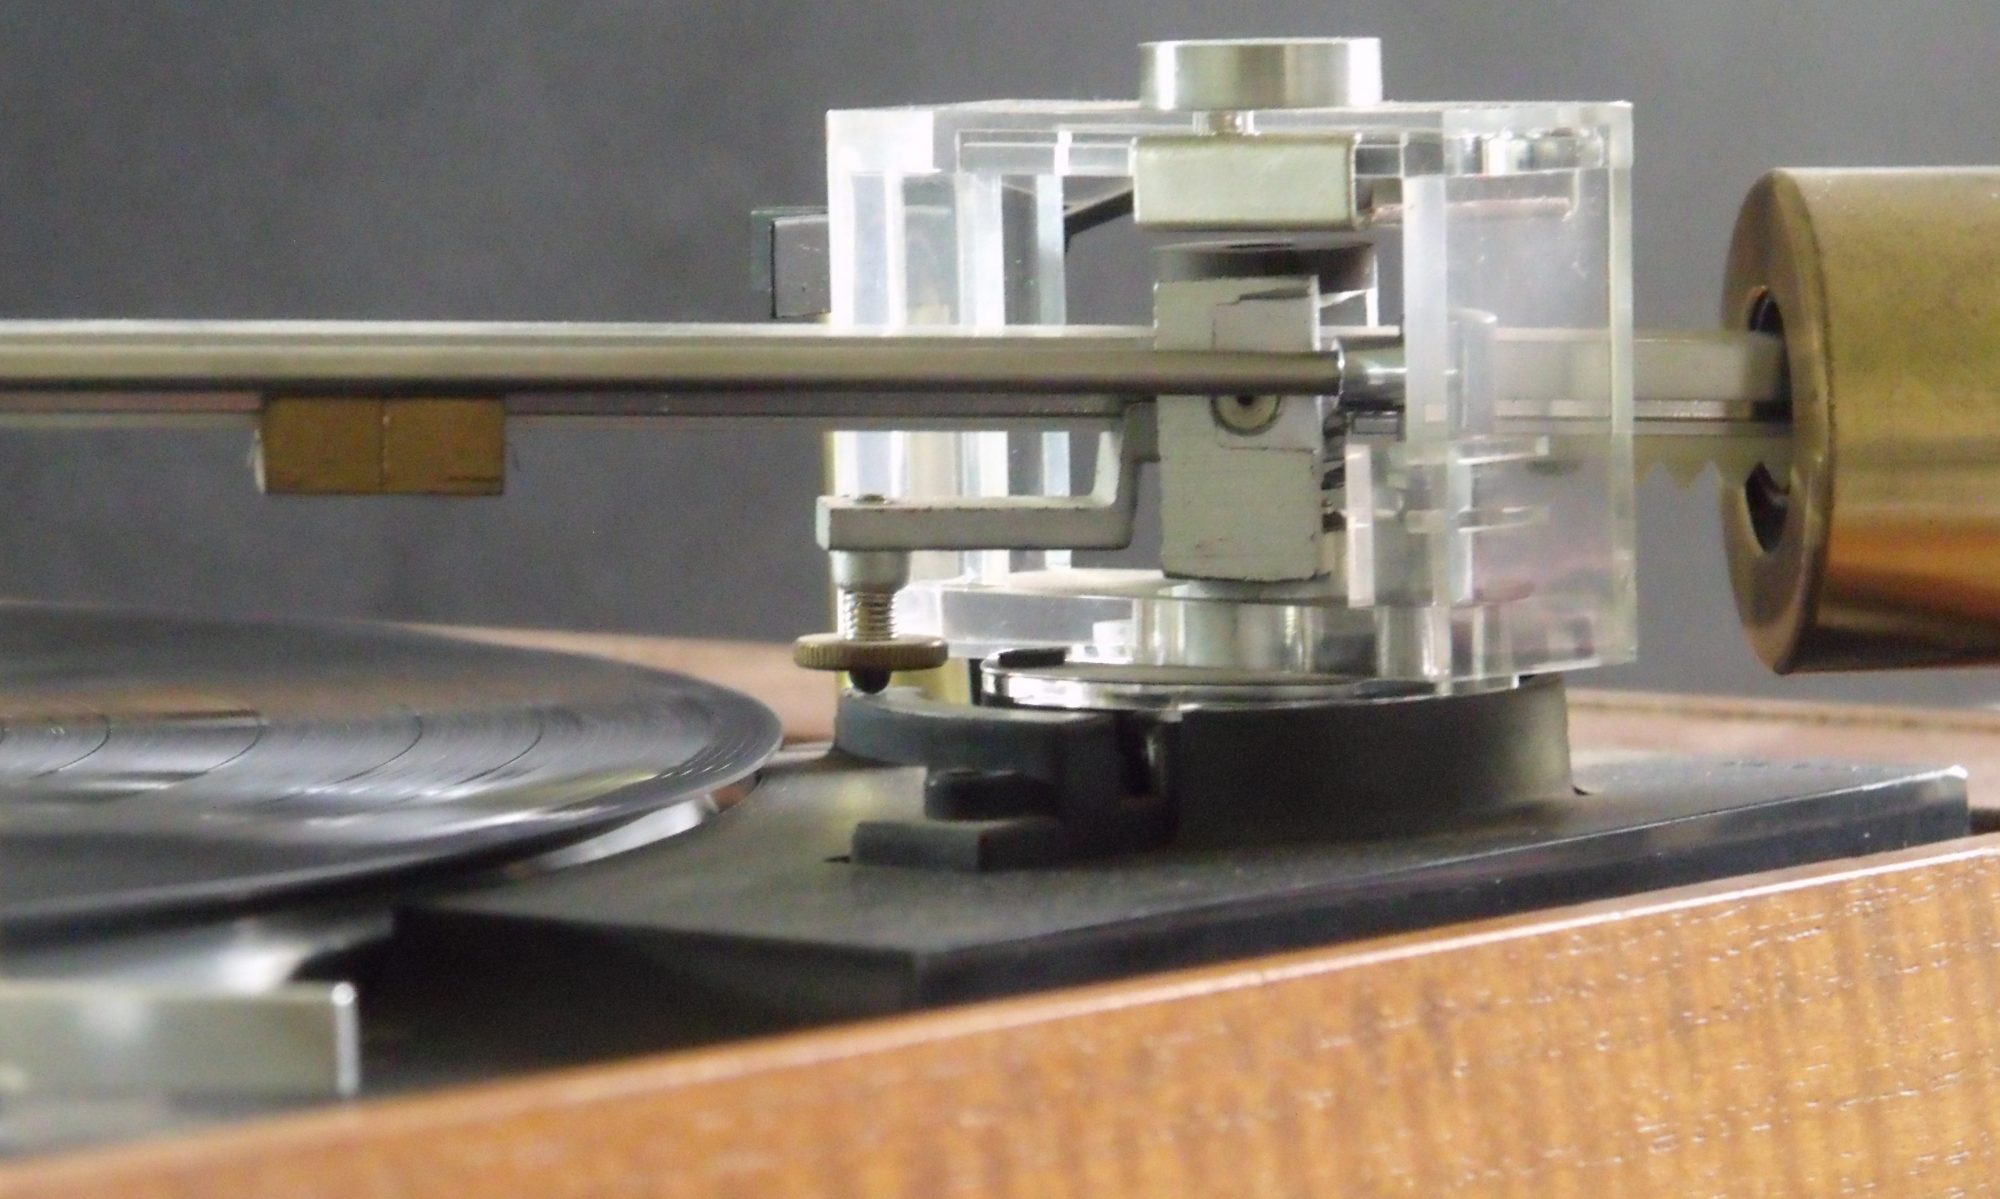
The tonearm assembly is less complicated than you might think. Looking on the right is the tonearm itself. Much shorter than we are used to, but otherwise familiar. At the bottom is the cartridge and at the top is the balance weight. Just below the balance weight is a gimbal bearing assembly. The metal to the left of the weight is just the cover for the signal wire connections. The black box at the bottom covers the offset detector, of which more later. All of the above is mounted on a metal plate which is guided along the black guide rail by the brass tube in the middle. The whole assembly is moved left and right by the tracking mechanism
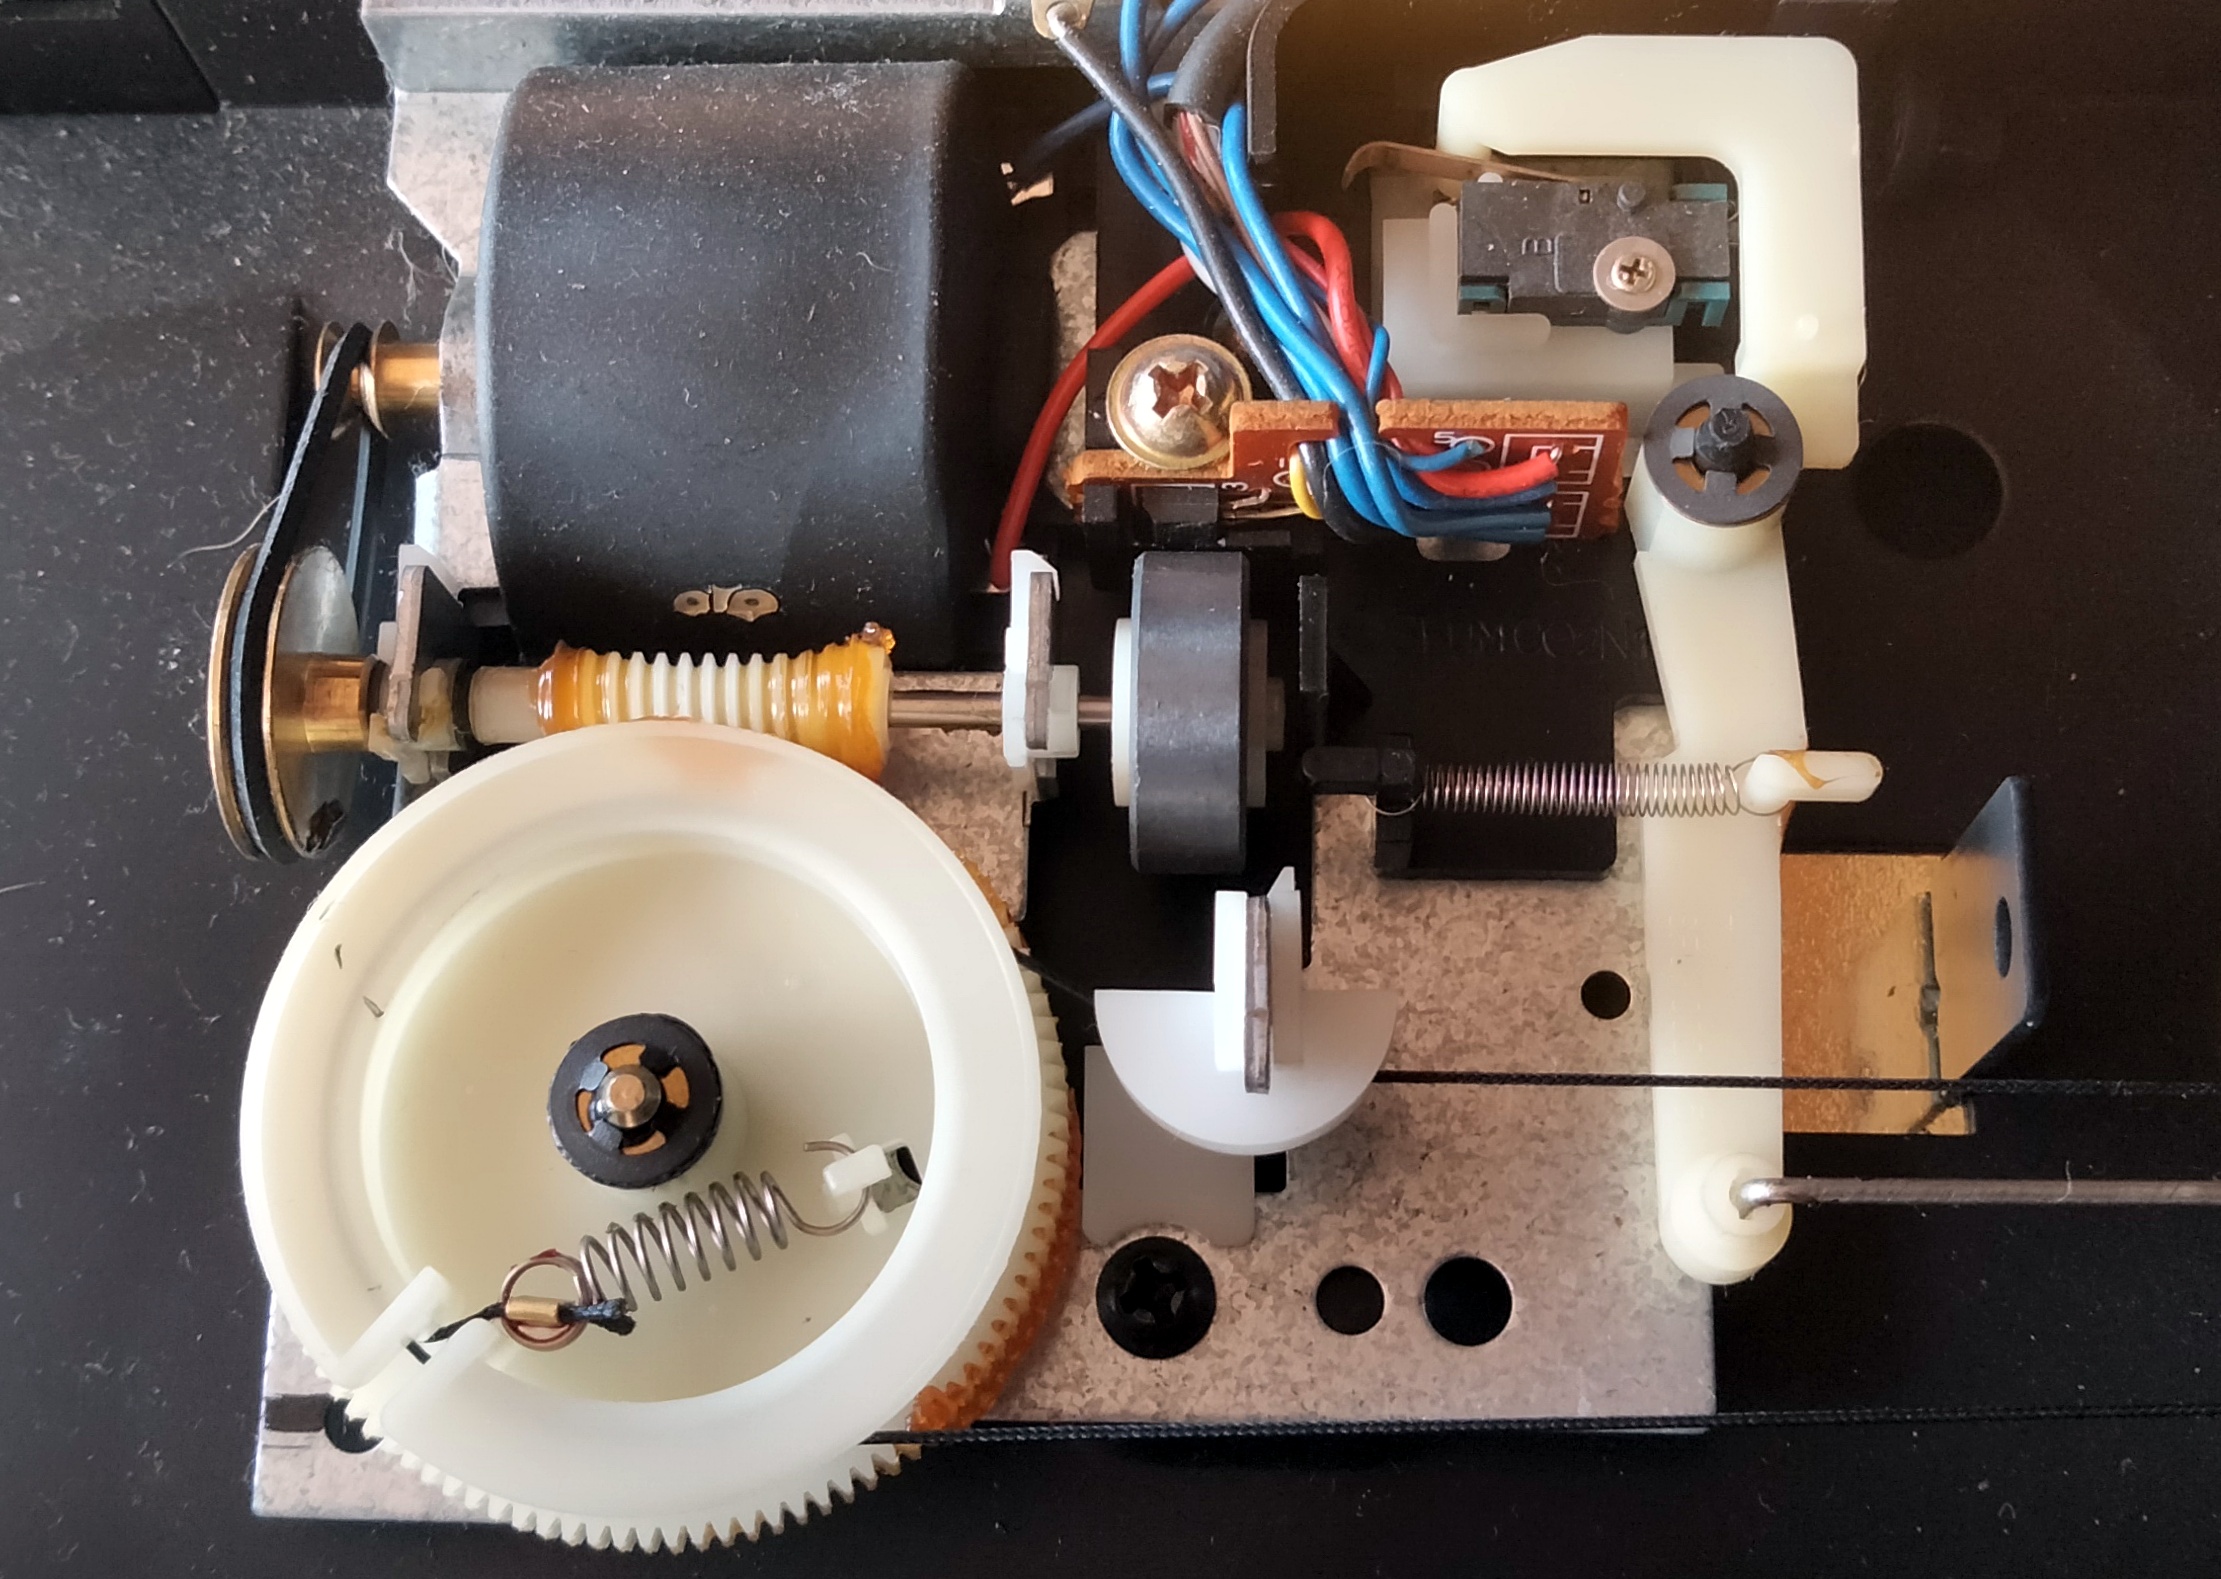
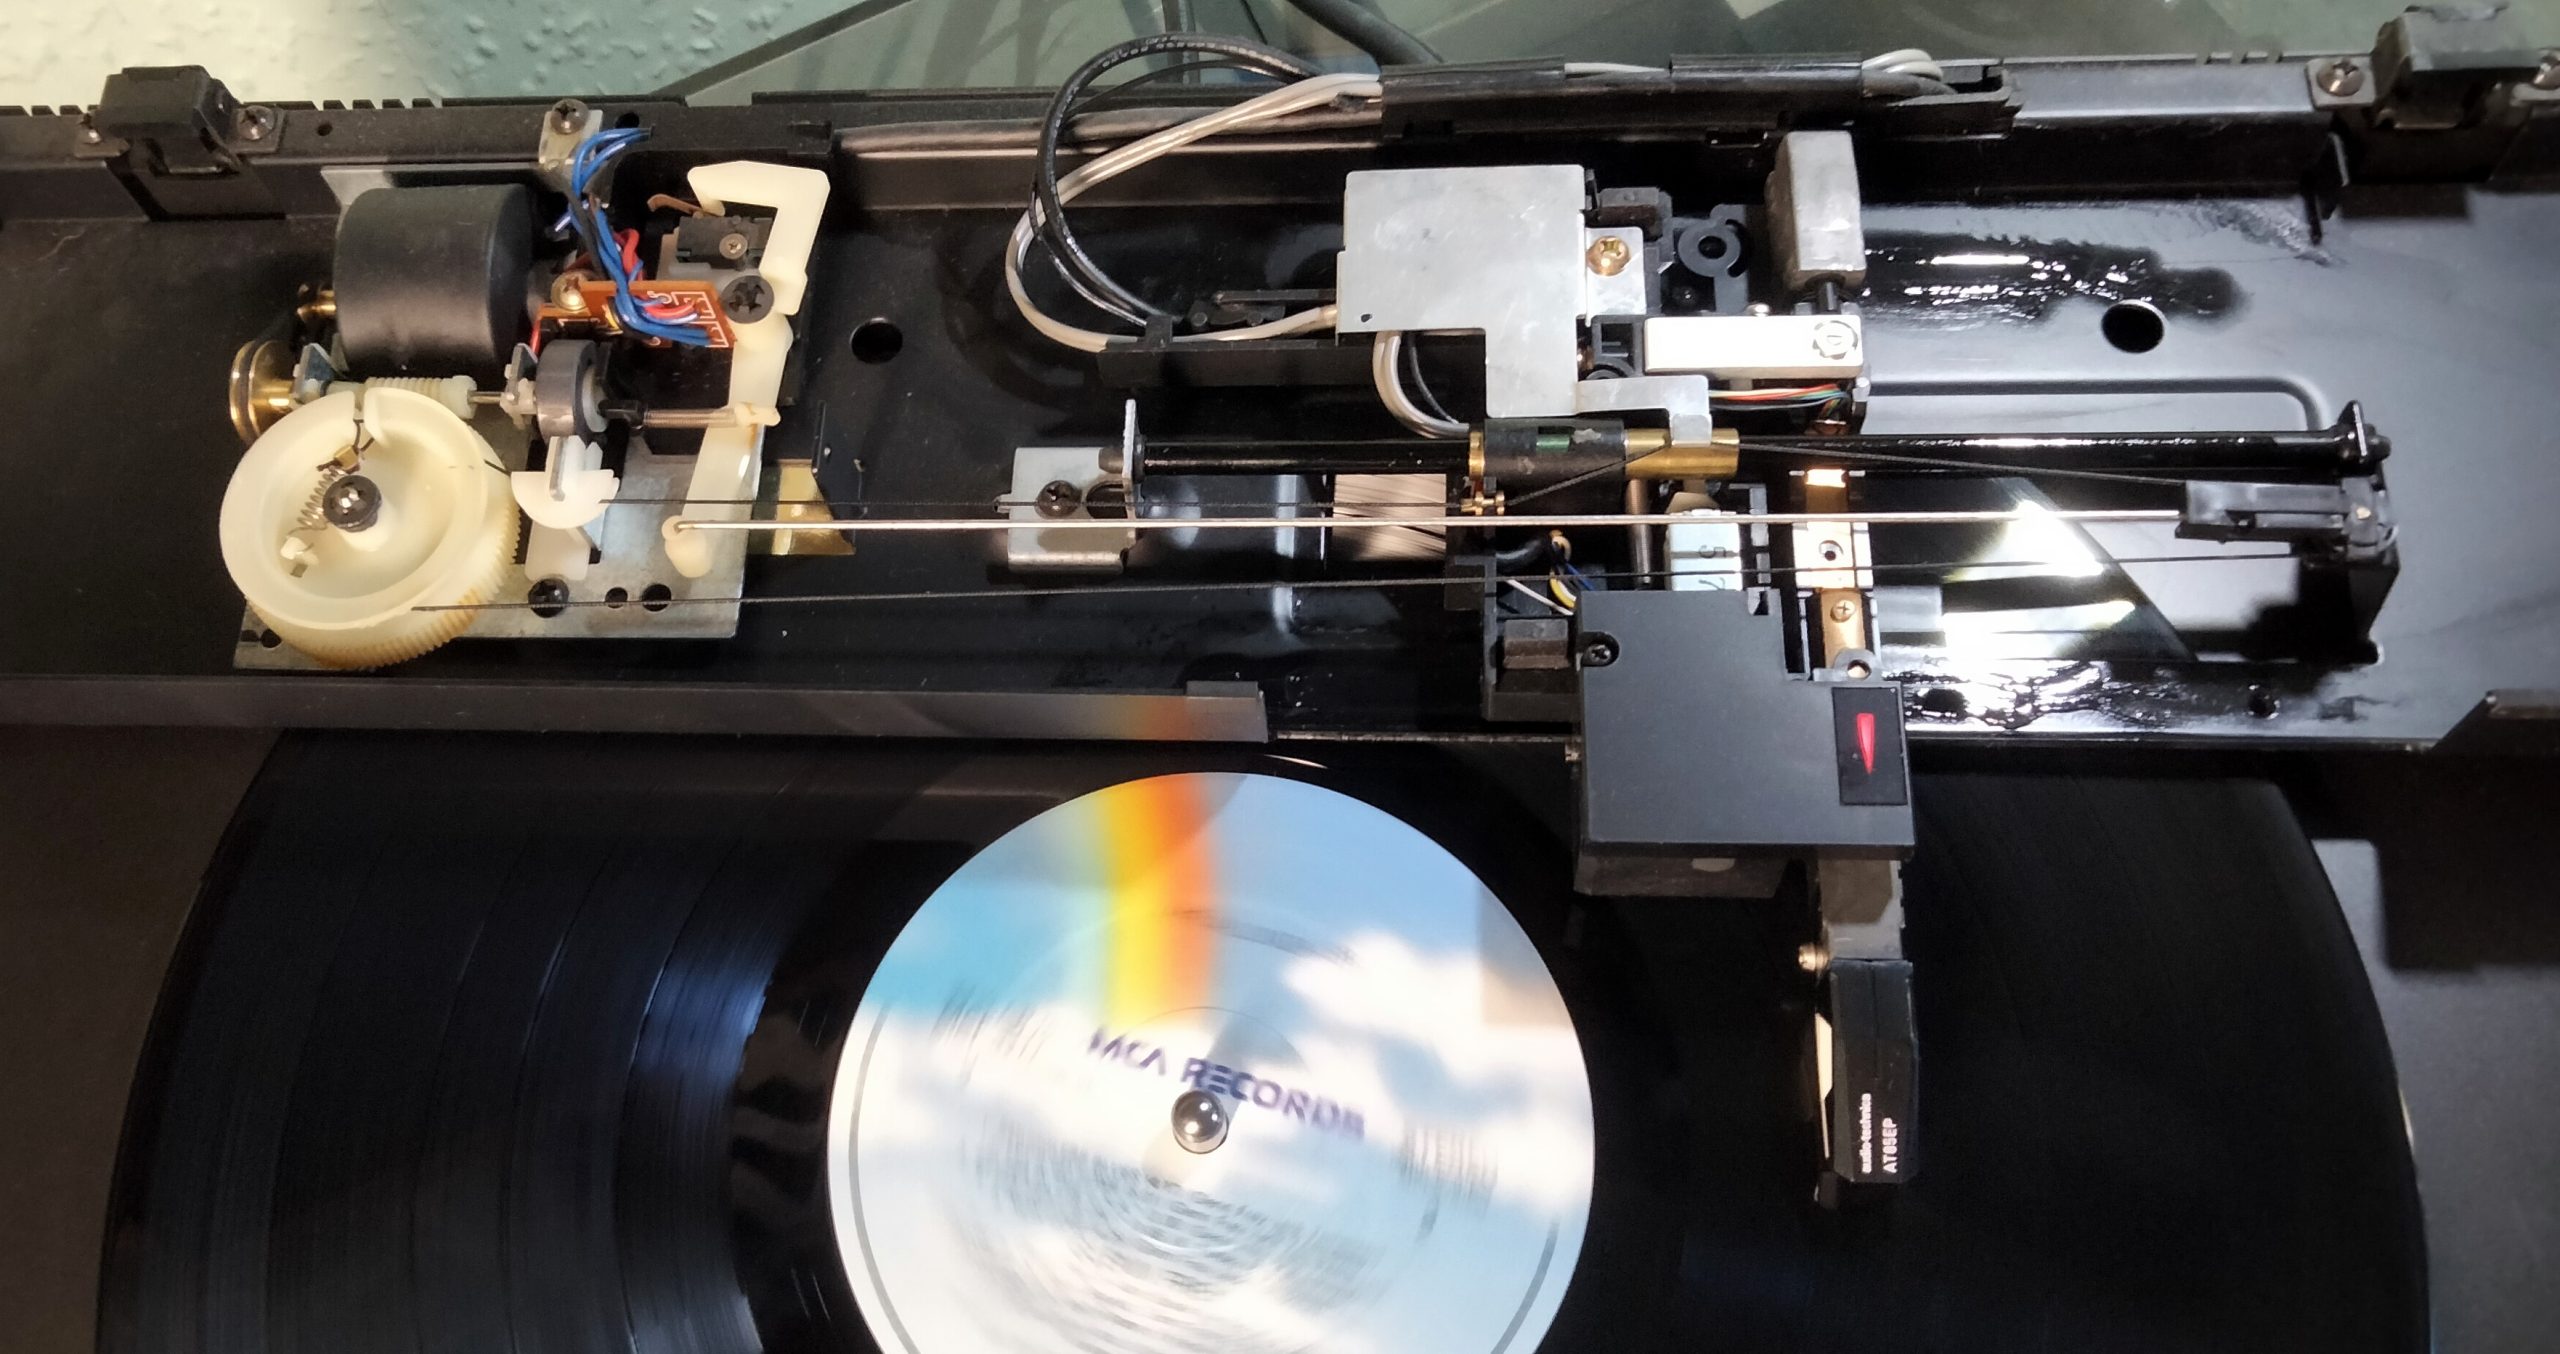
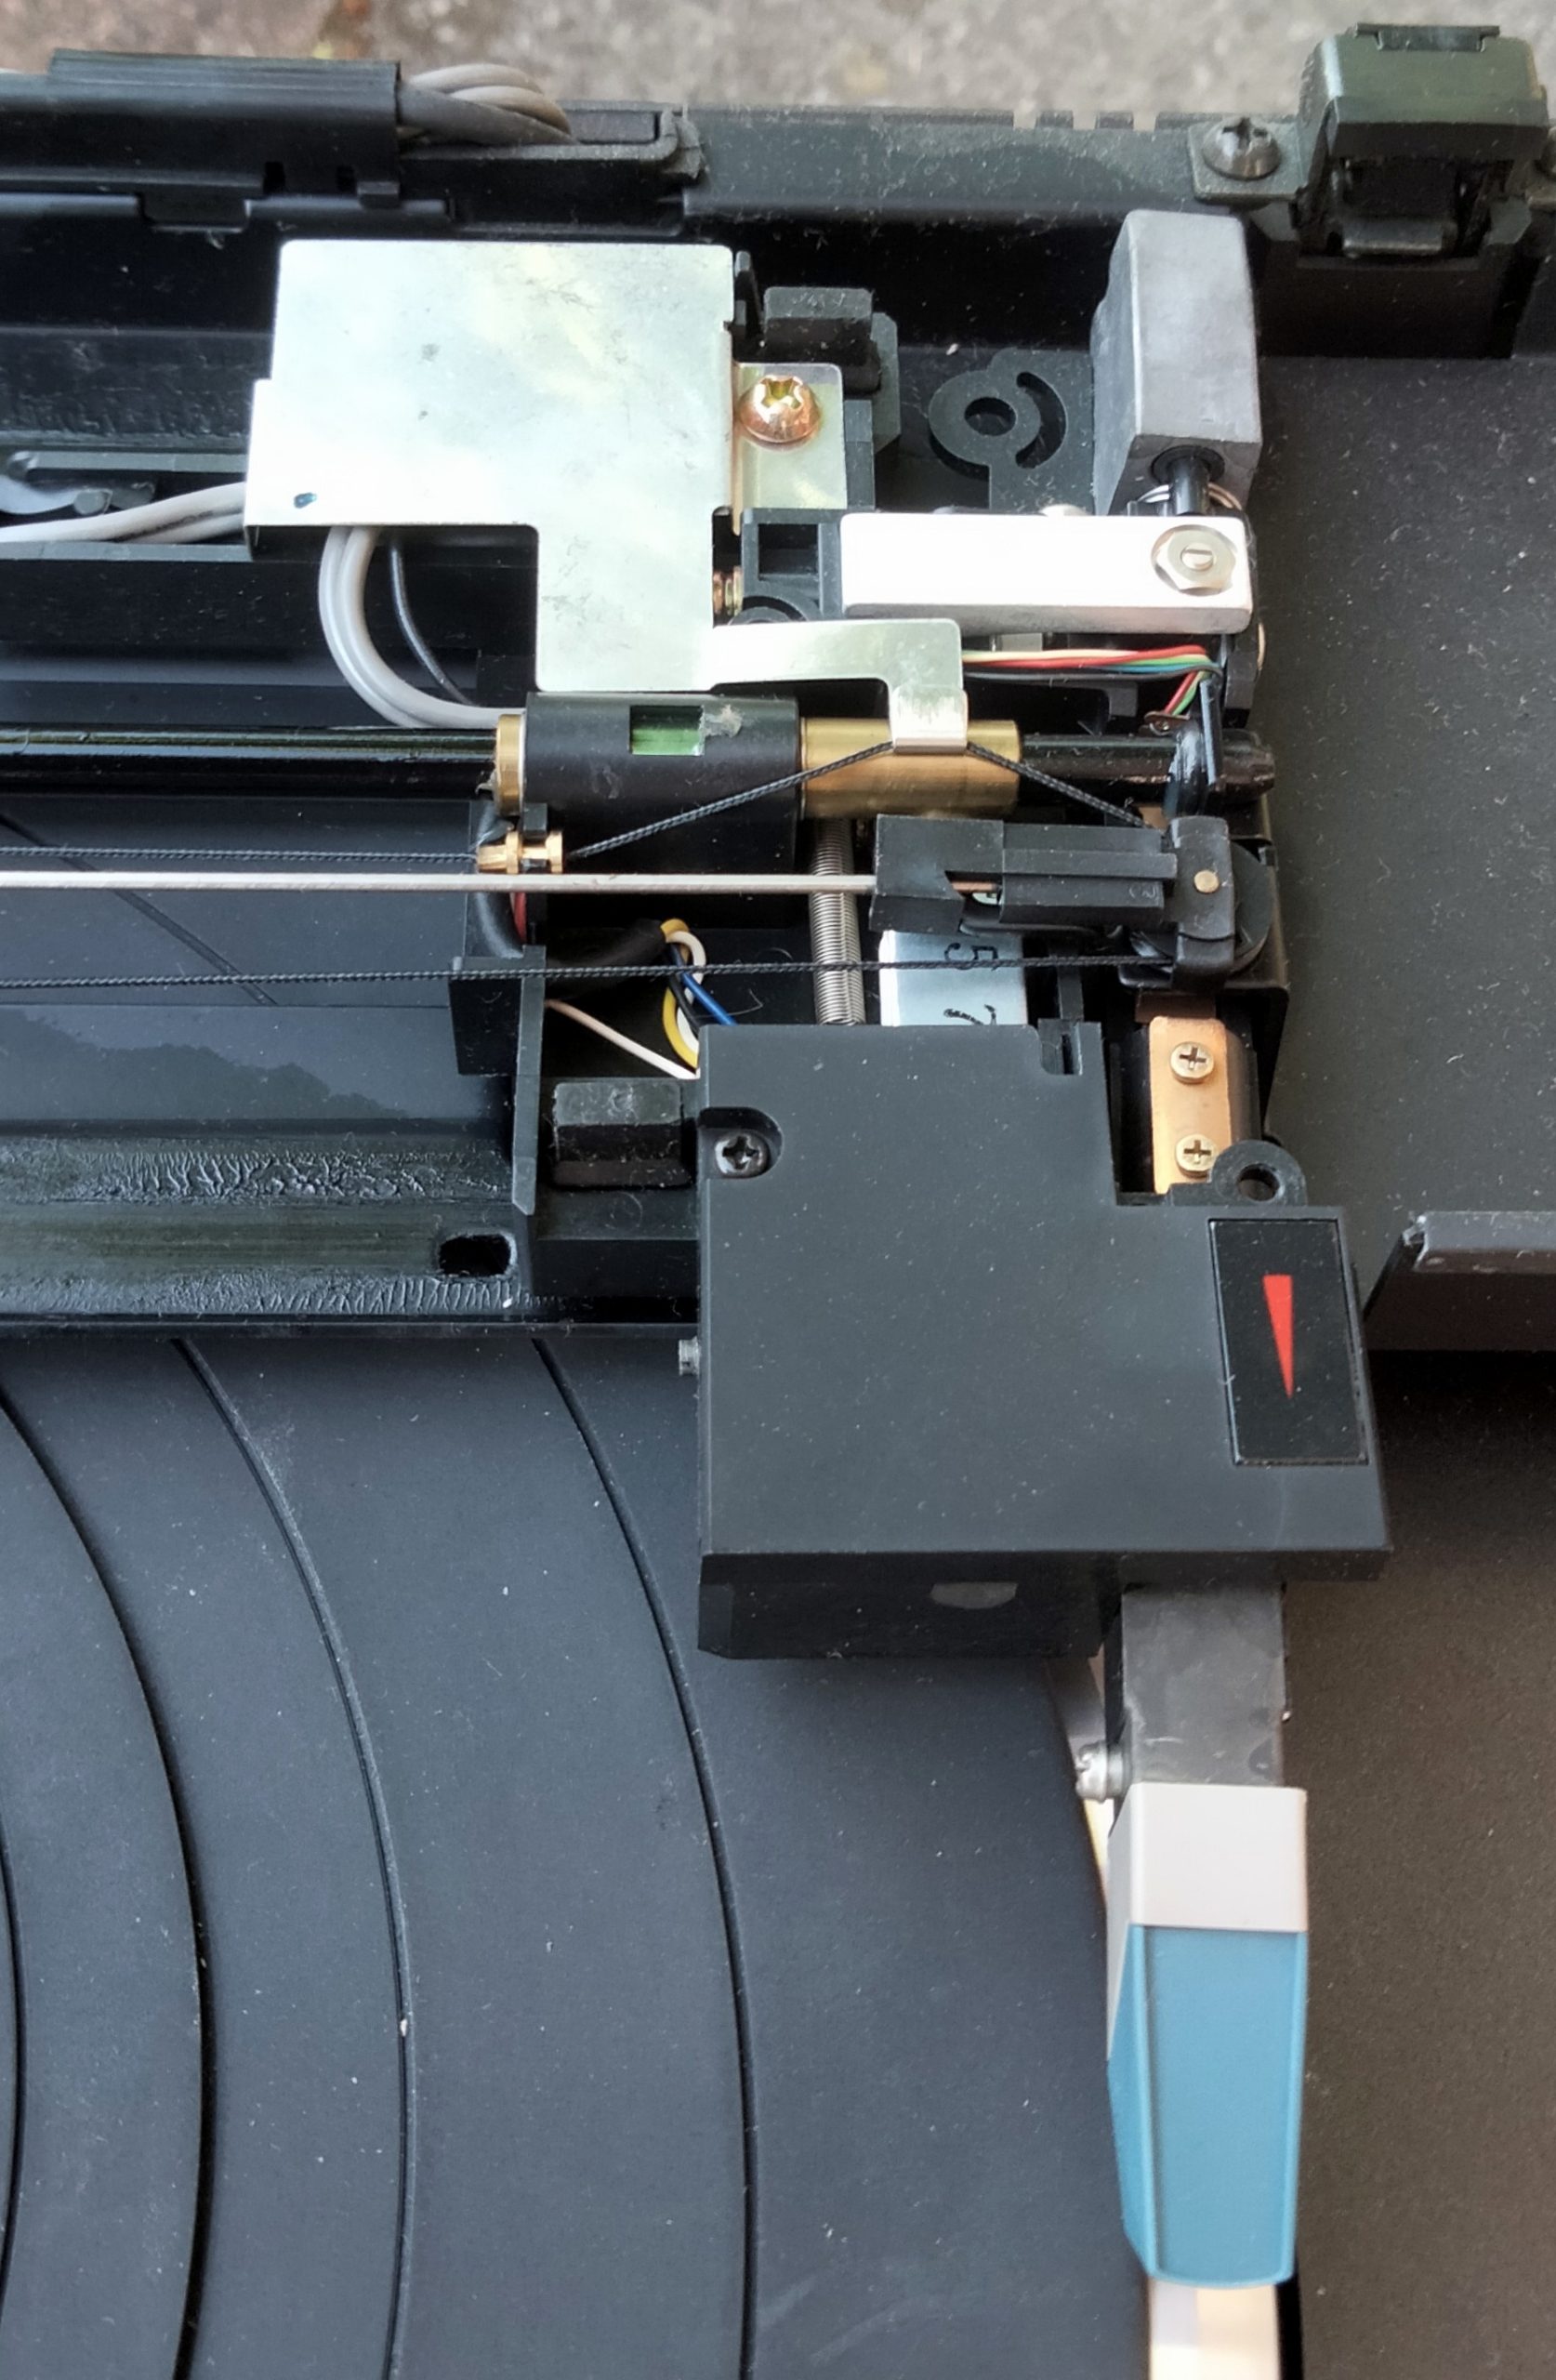
I had expected to find some sort of long worm gear or toothed belt to move the tonearm. Actually it’s something usually seen in a radio tuner to move the indicator pointer across the scale. A cord drive. The cord, or drive rope, as Technics call it, is held in tension between two pulleys and fixed to the tonearm base plate. When you turn the big pulley the rope moves, taking the arm with it. The pulley has a gear integrated with it. A worm gear engages with this and is in turn moved by a small motor via a drive belt. A circular magnet on the worm gear shaft is detected by a “hall sensor” on the circuit board to inform the microcontroller that the worm has turned. This combination means that the mechanism could be made to move a little or a lot. Fast or slow. All with considerable precision.
Dried out grease on these gears and the guide rail made it all very stiff. The stretched motor belt didn’t help. The motor turns but can’t make anything else move. When given a little help with the fingers it loosened up a little and I was able to get it to start playing a record. However, it soon jumped because the tracking wasn’t keeping up.
Cleaning up of the old sticky grease with IPA and applying fresh made a big difference. With a finger on the drive belt to increase tension, it was now able to play records. I had to wait a couple of days for the replacement belt to arrive but all is well now it is fitted.
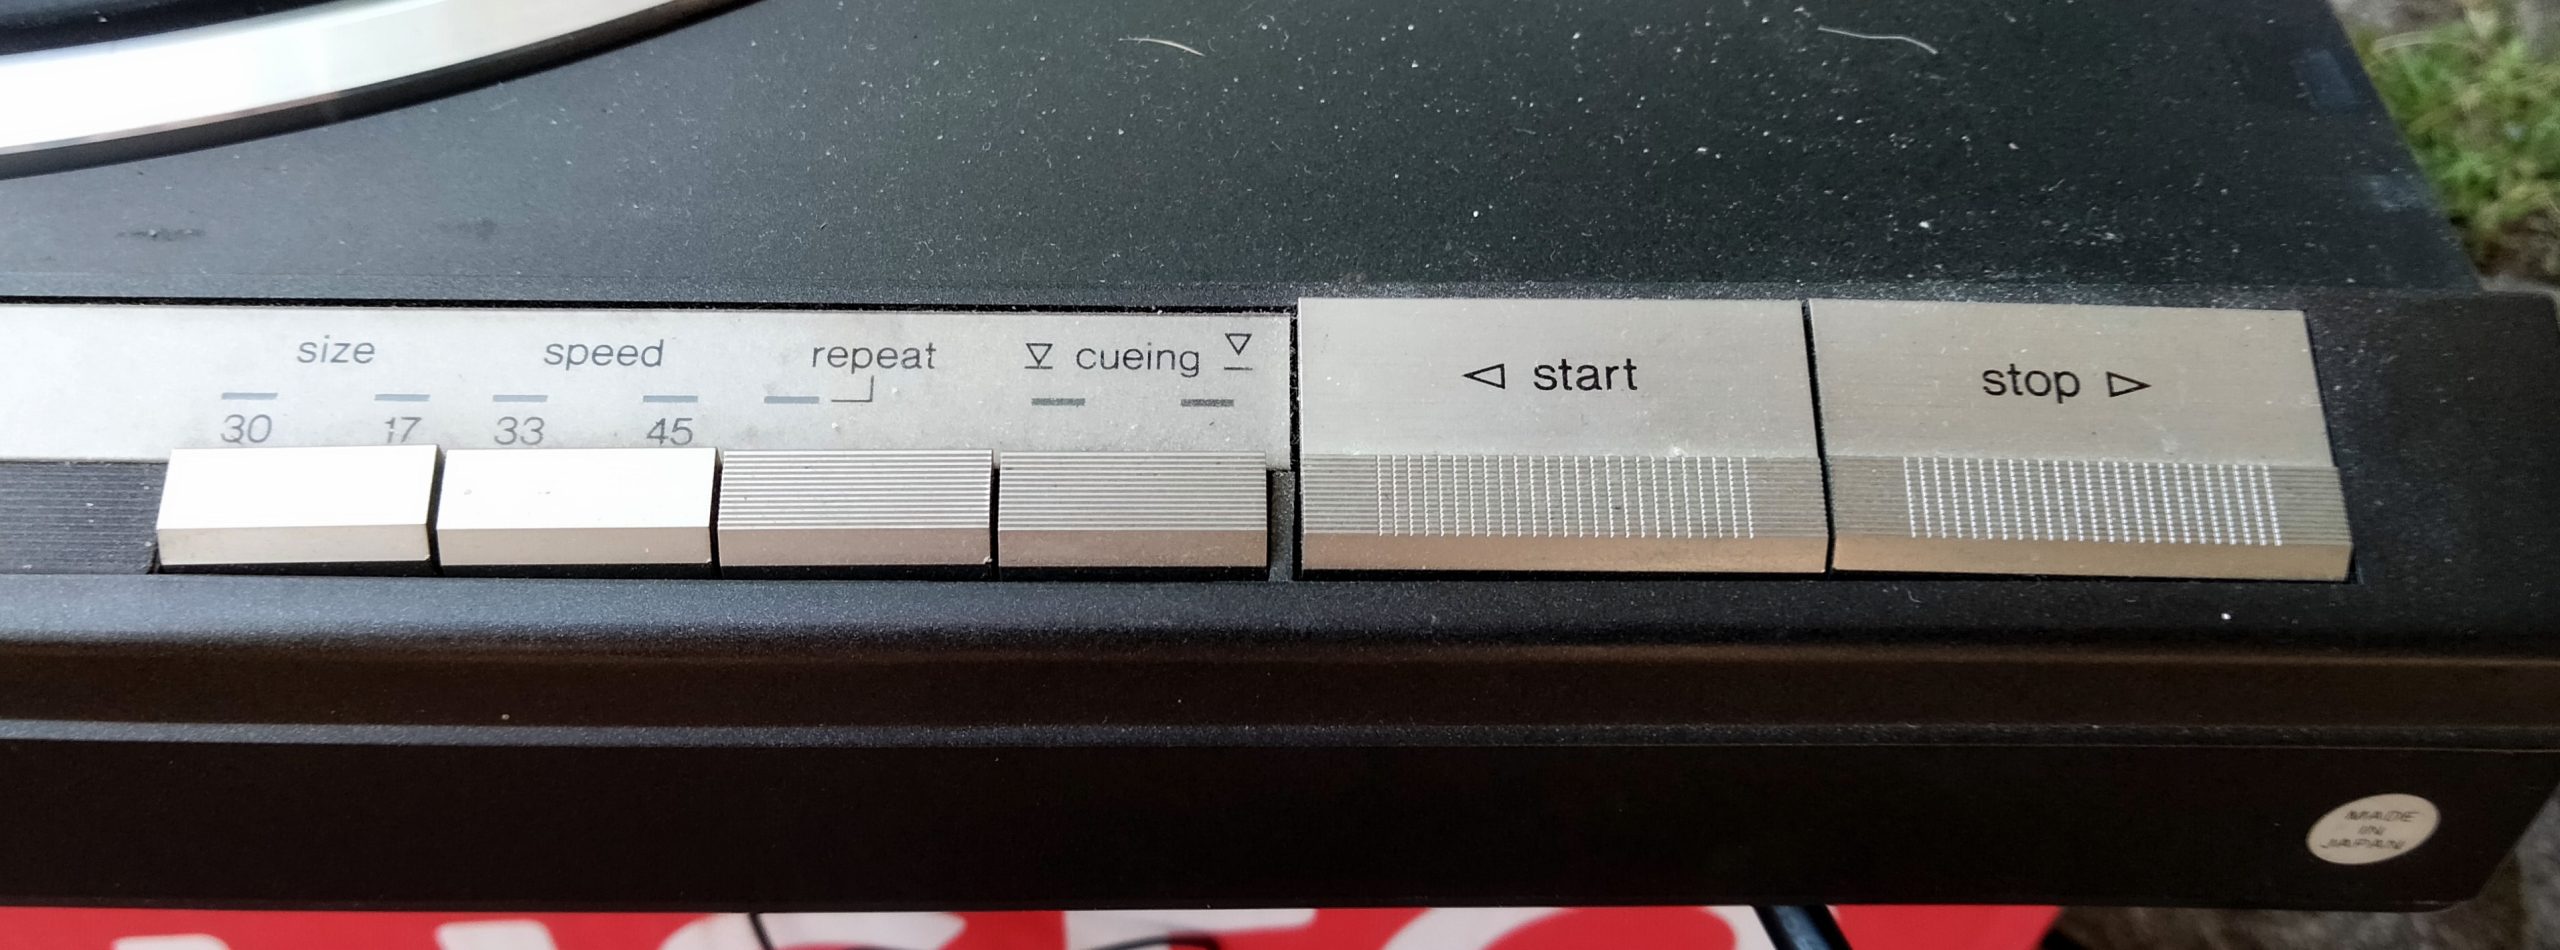
The simple controls, which are accessible with the lid down, are read by the microcontroller in the base of the turntable. This controls anything that moves, including the arm moving mechanism just described and a solenoid to lift the arm off the record. The platter direct drive mechanism, including speed, is also controlled by the microcontroller. As is the solenoid which raises and lowers the stylus.
The programming of the controller orchestrates the actions of the system in response to button presses. Lifting the arm, starting the motor at the correct speed, moving the arm so it’s over the start of the record and lowering the needle. Playback begins.
With the stylus in contact with a moving record things get complicated. I had naively assumed that the arm would have a simple up/down pivot, with the tracking mechanism taking care of lateral movement. That’s never going to work when you think about it. How would it cope with a record with an off centre hole? Or a warped record? Indeed, any sort of imperfection. The arm pivot is actually a full gimbal. The tracking motor moves the whole arm assembly, including the pivot point, as the record plays. This keeps the arm parallel to the grooves, while the gimbal gives the necessary freedom of movement for the stylus to track well. I’ve already mentioned that the tracking mechanism allows for very small lateral movements of the pivot point. As a record plays the arm turns like a conventional radial tracking arm, following the groove. Very soon the stylus is no longer tangential to the groove. This offset must be detected and corrected before it becomes the very problem we are trying to eliminate.
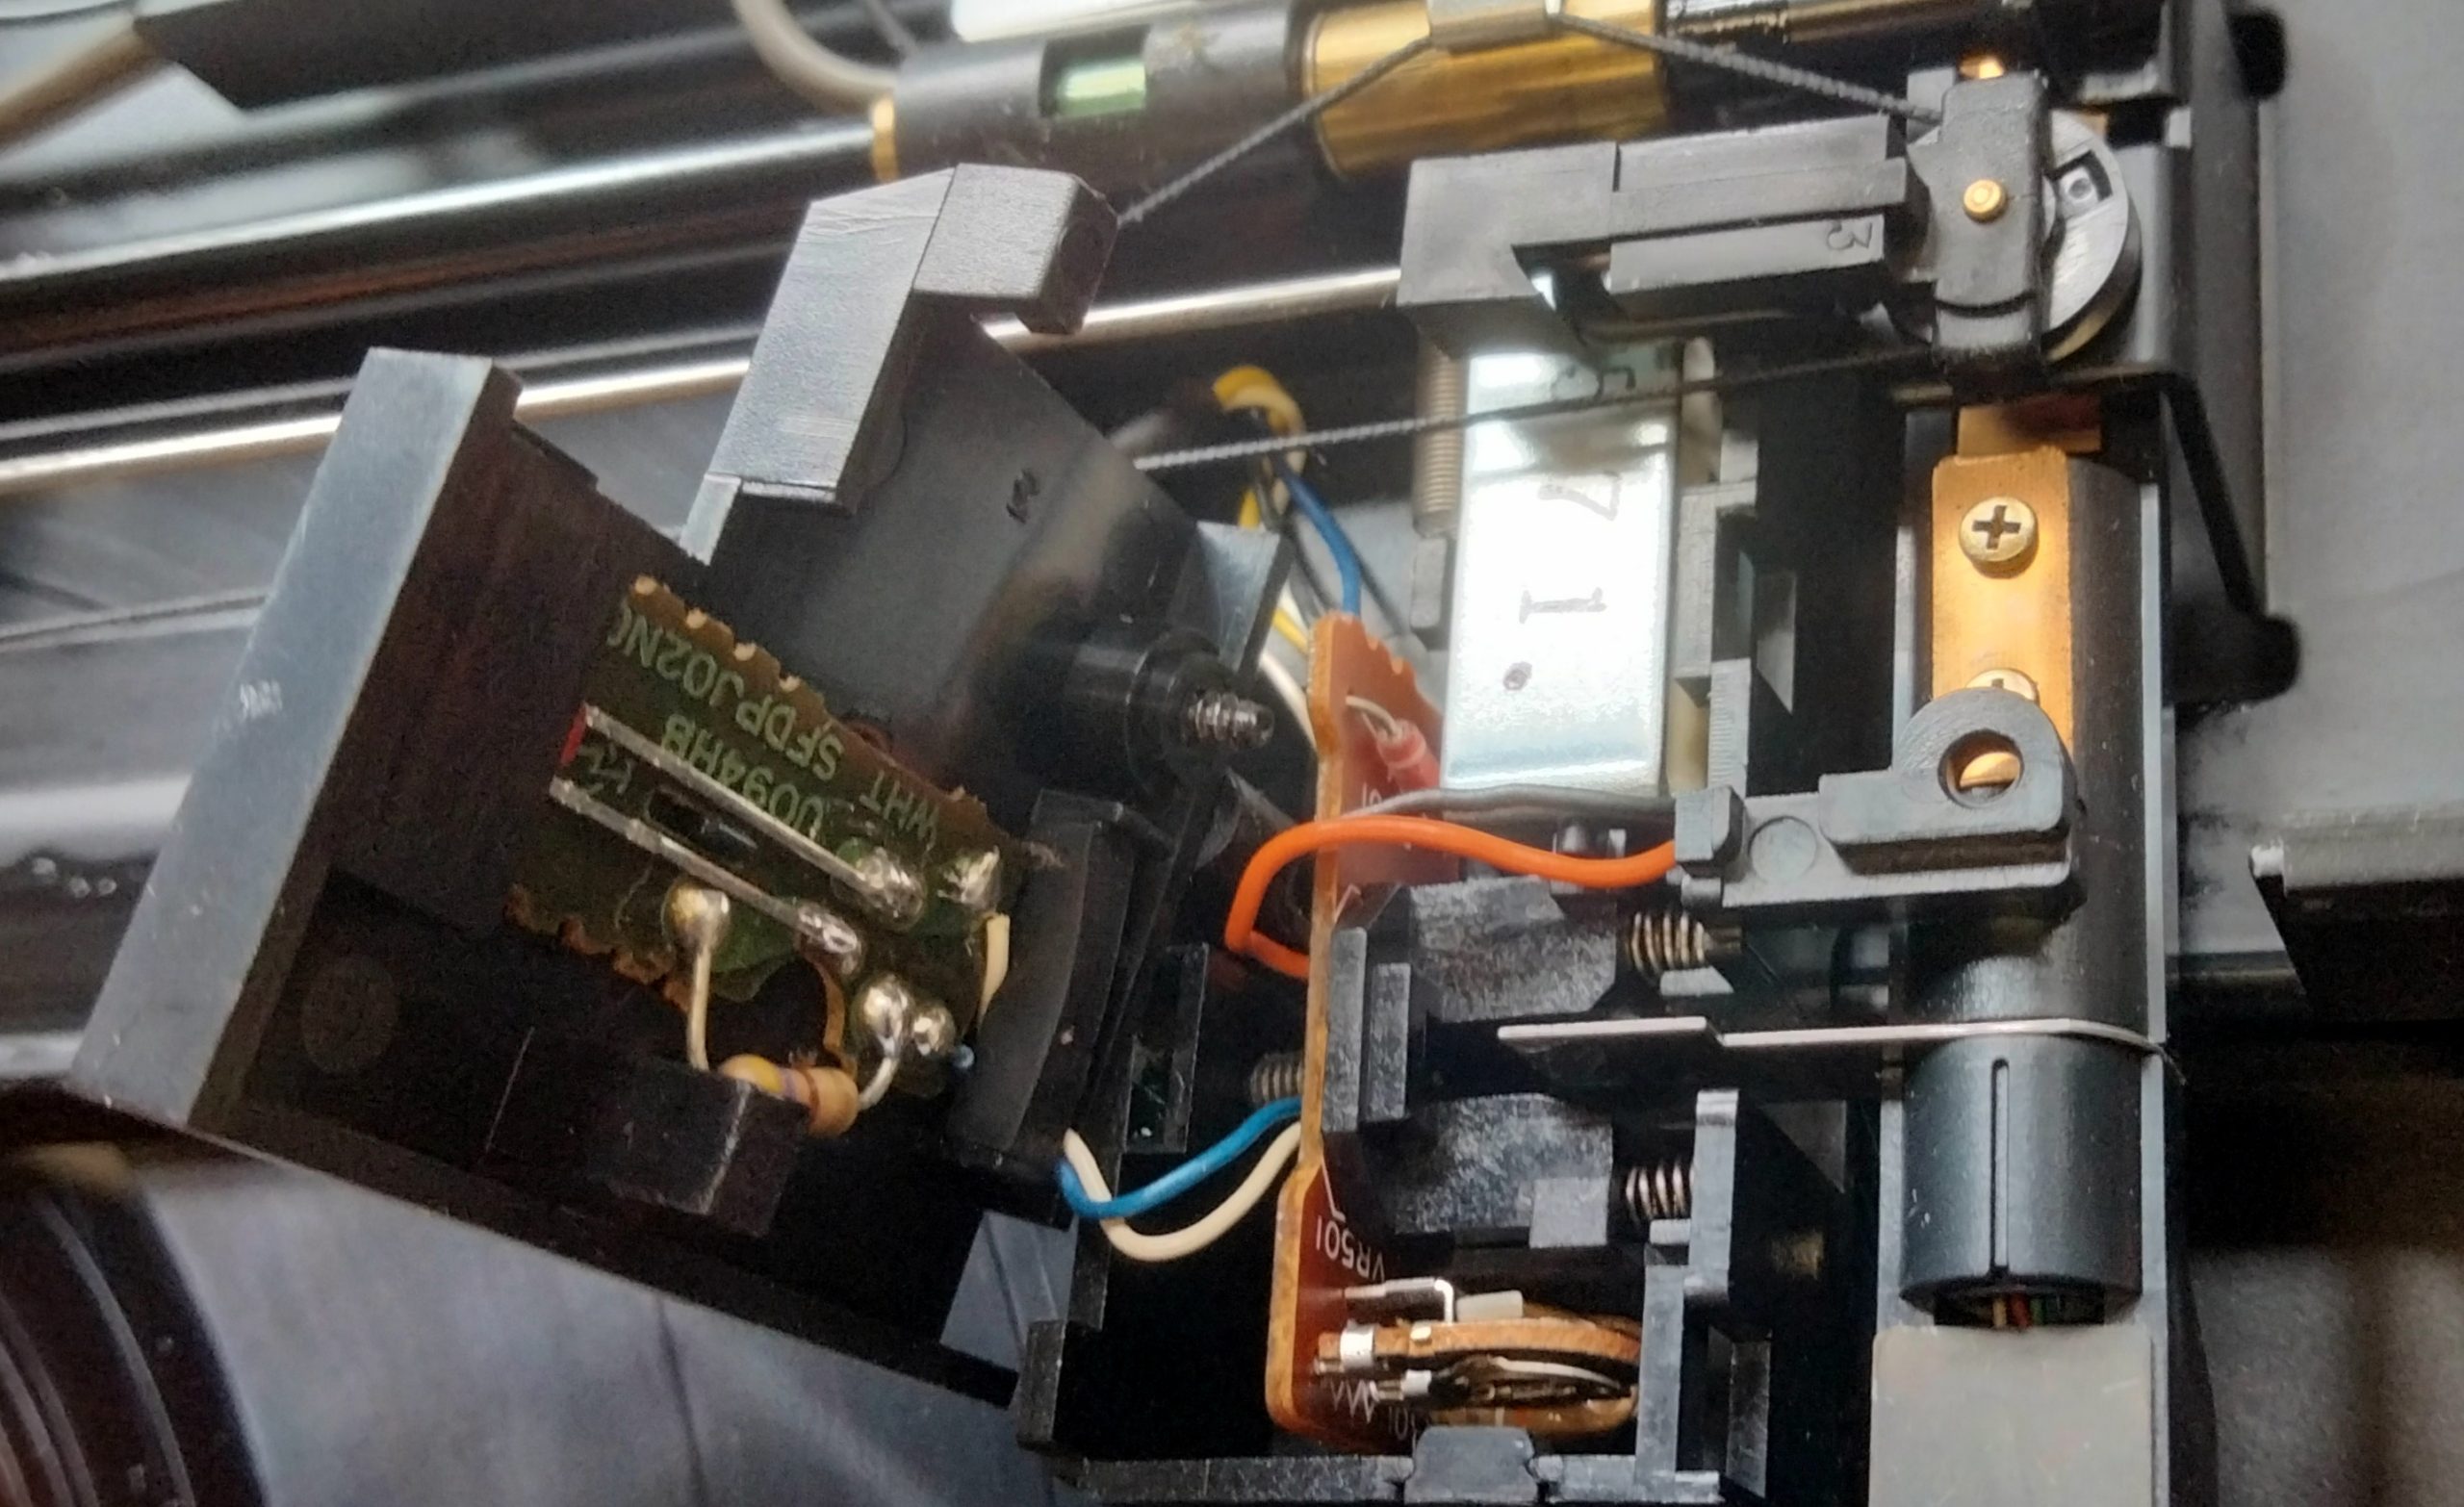
Hidden under a black plastic cover is the offset detector. Here we see, on the left, the connections for the LED for the illuminated arrow which we see through the turntable lid. Offset detection is achieved with an optical device. There is no physical connection to the arm, so playback is not compromised. A metal shutter plate extends sideways from the arm into the U shaped plastic component on the circuit board. This is the optical sensor. Light is sent out of one side to cross the gap in the U and be detected on the other, with the signal being sent to the microcontroller. When correctly adjusted, with the arm tangential to the grooves, the shutter blocks about half the light passing across the detector. The arm swings as it tracks the record moving more of the shutter into the light path. This reduction in light is a measure of the arm offset from it’s optimum position. The micro-controller responds by telling the tracking mechanism to move the pivot point a little until the offset is removed. You actually see the tracking motor move a turn every second or so. In this way the arm is kept parallel to the grooves without compromising the ability to track.
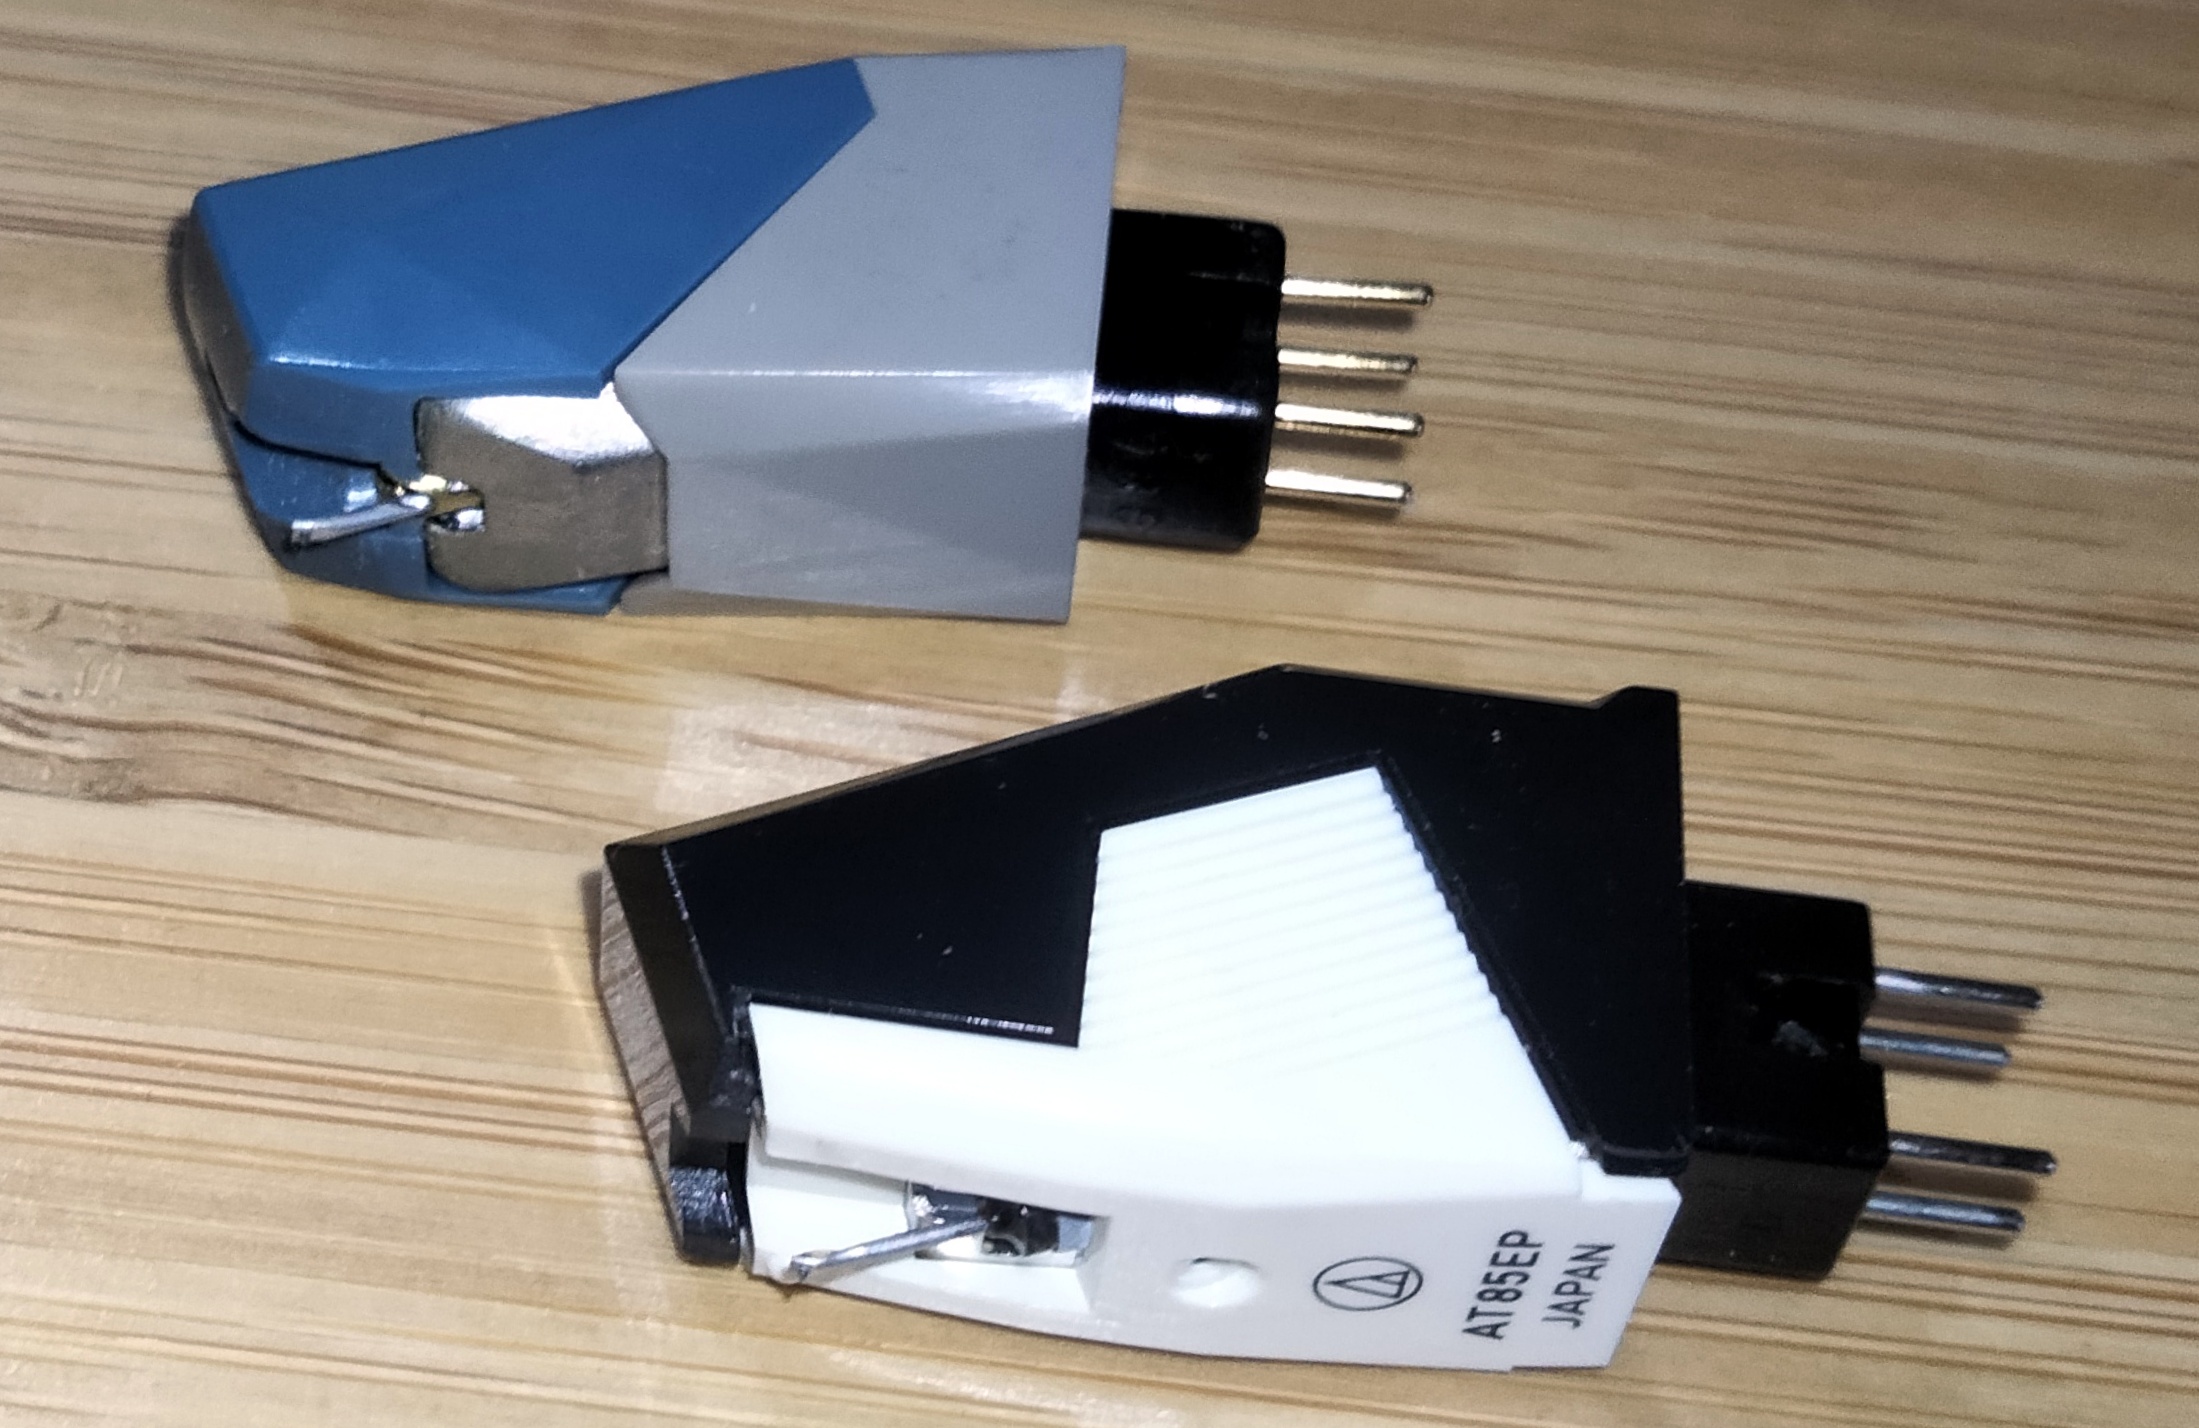
Although the supplied cartridge looks fine, I have an almost new AT85EP cartridge on another turntable that I don’t use. I transferred this over. A trivial job with a P-Mount cartridge like this.
After a good clean and with the lid re-attached this turntable is a delight to use. It has replaced the Garrard Zero 100 turntable that I had been using as my automatic turntable.
While it will never match the fidelity of my Thorens TD160 it is much more convenient to use for most use and certainly holds it’s own for casual listening. Both are permanently connected to my main HiFi system to give me the best of both worlds.
Further reading
- Garrard Zero 100. This turntable tackles the offset angle problem, but in a rather different and fully mechanical way.
- Technics SL QX200. I’ve had this apart to examine the direct drive system, which is similar to that used here.
- P Mount cartridges. Changing a TP/4 P Mount cartridge