These beauties were gifted by a friend. They are in excellent cosmetic condition.
Unfortunately, under the covers, all is not well.
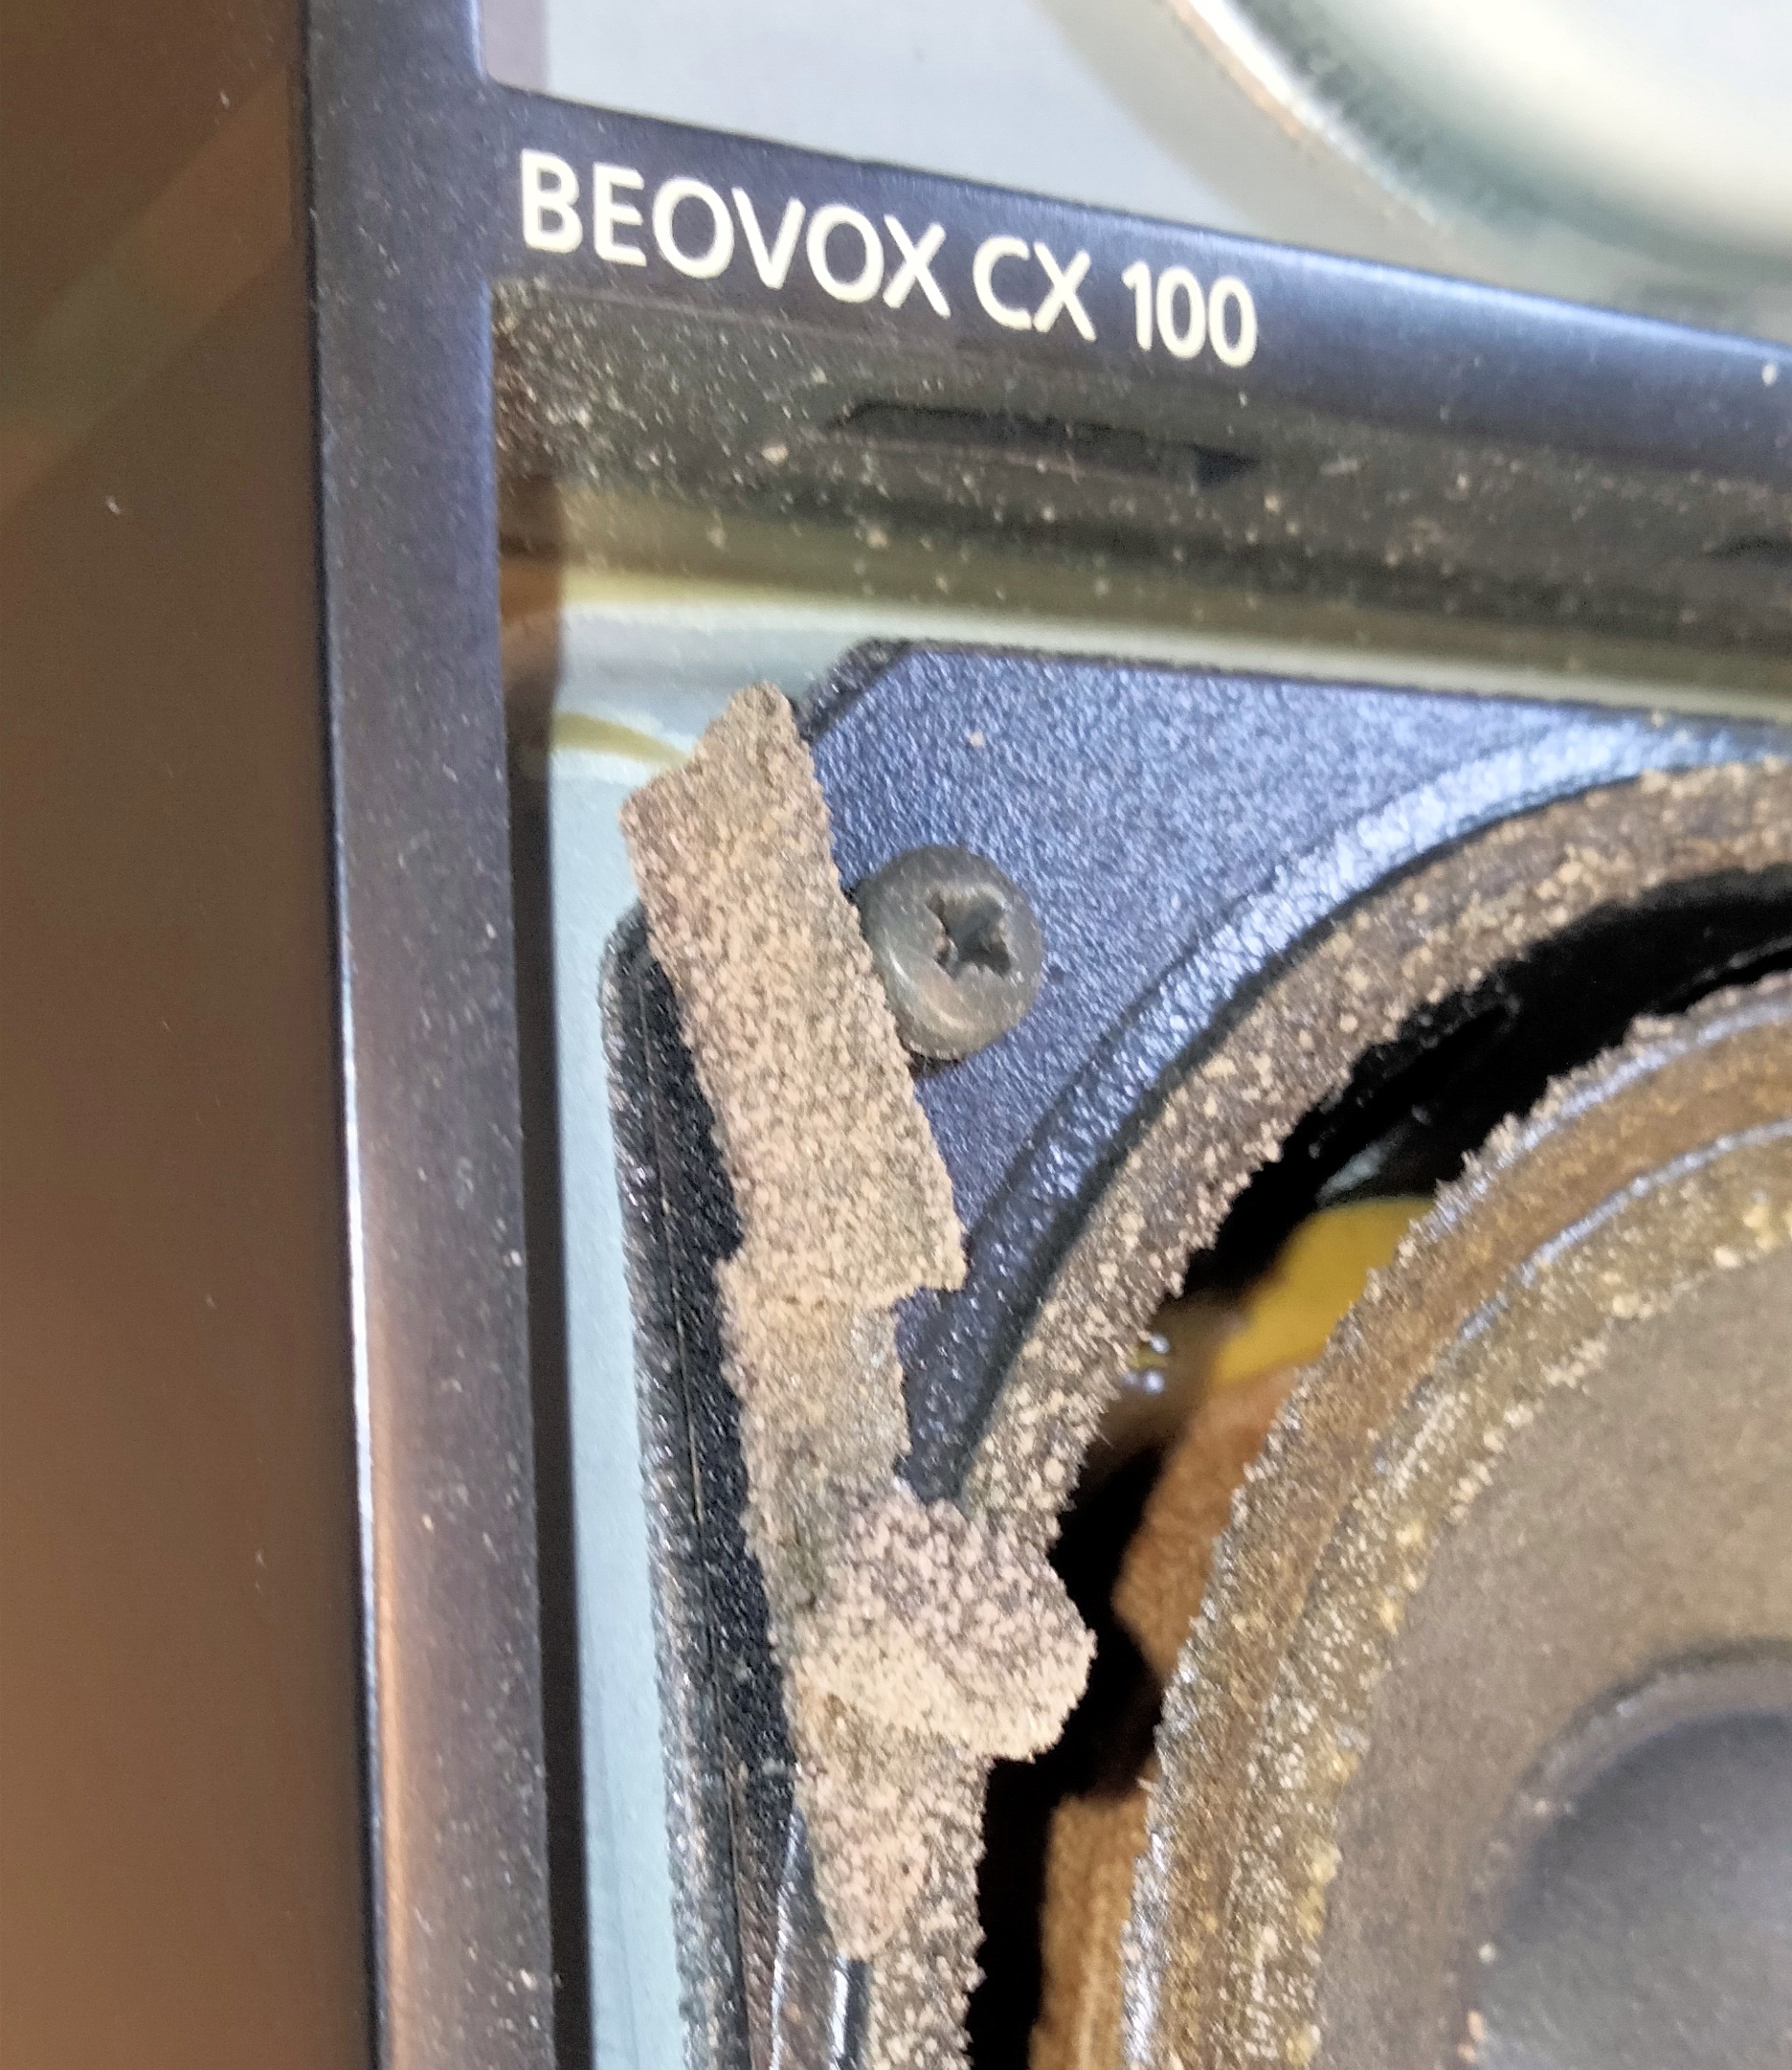
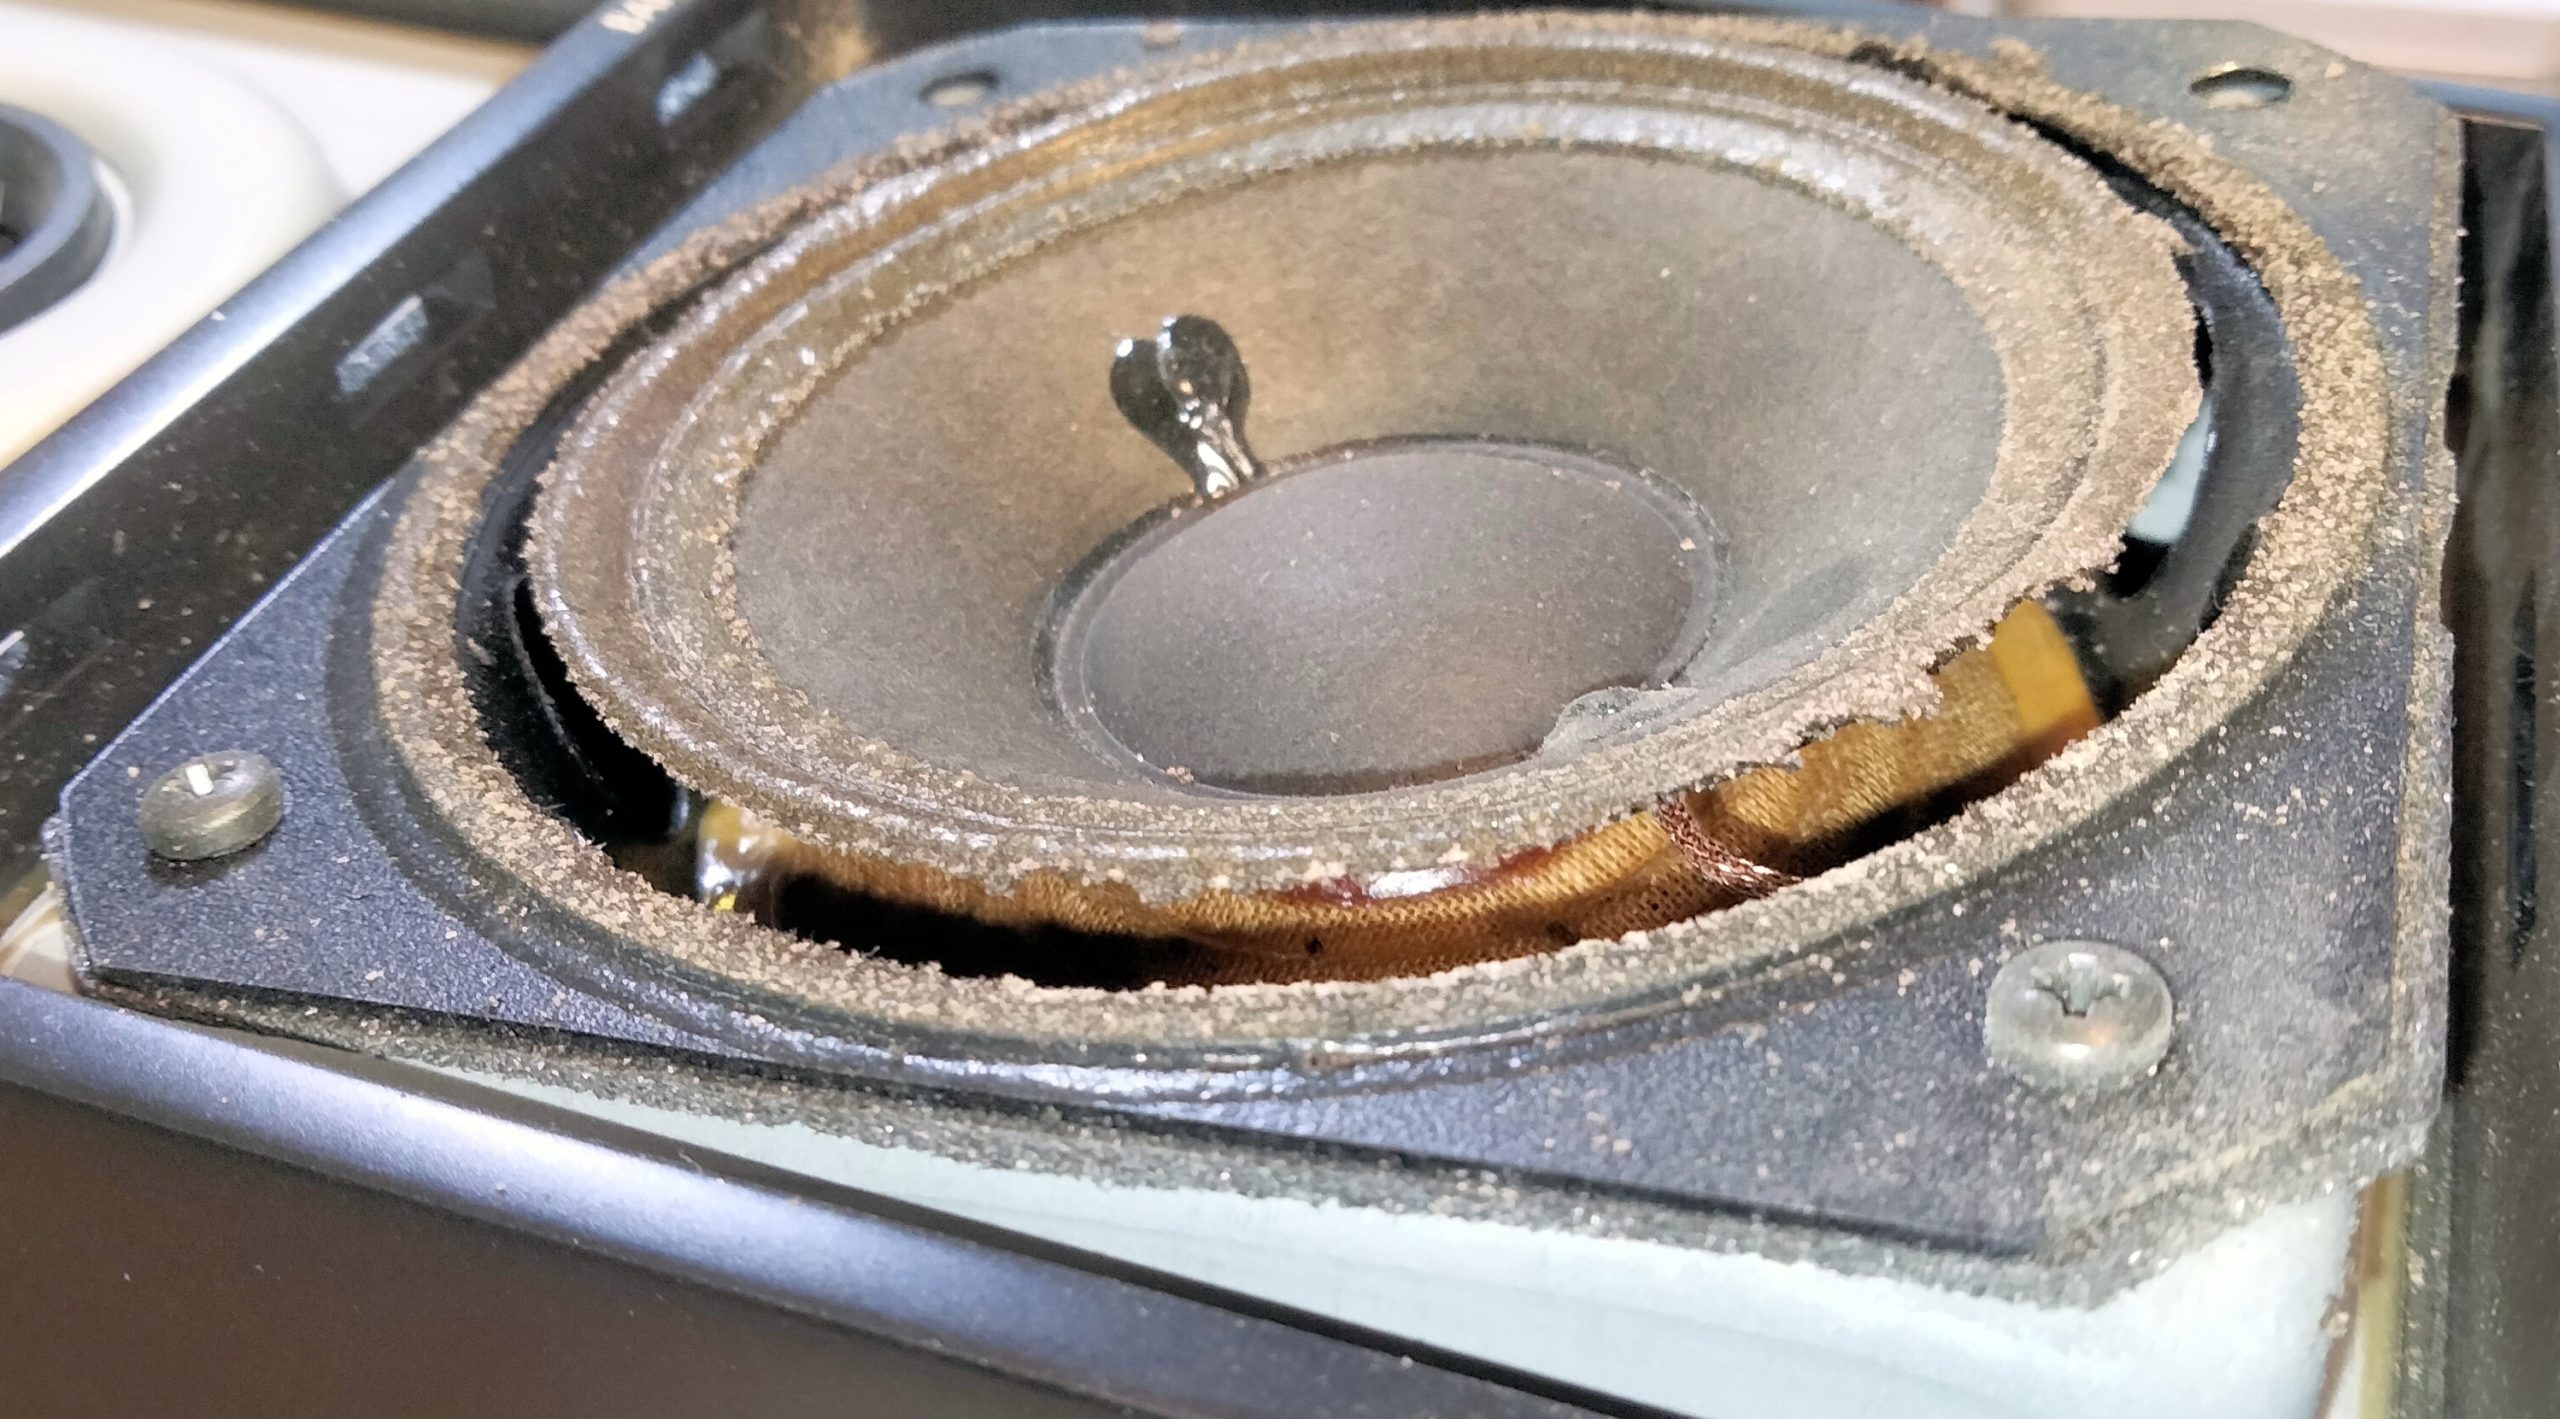
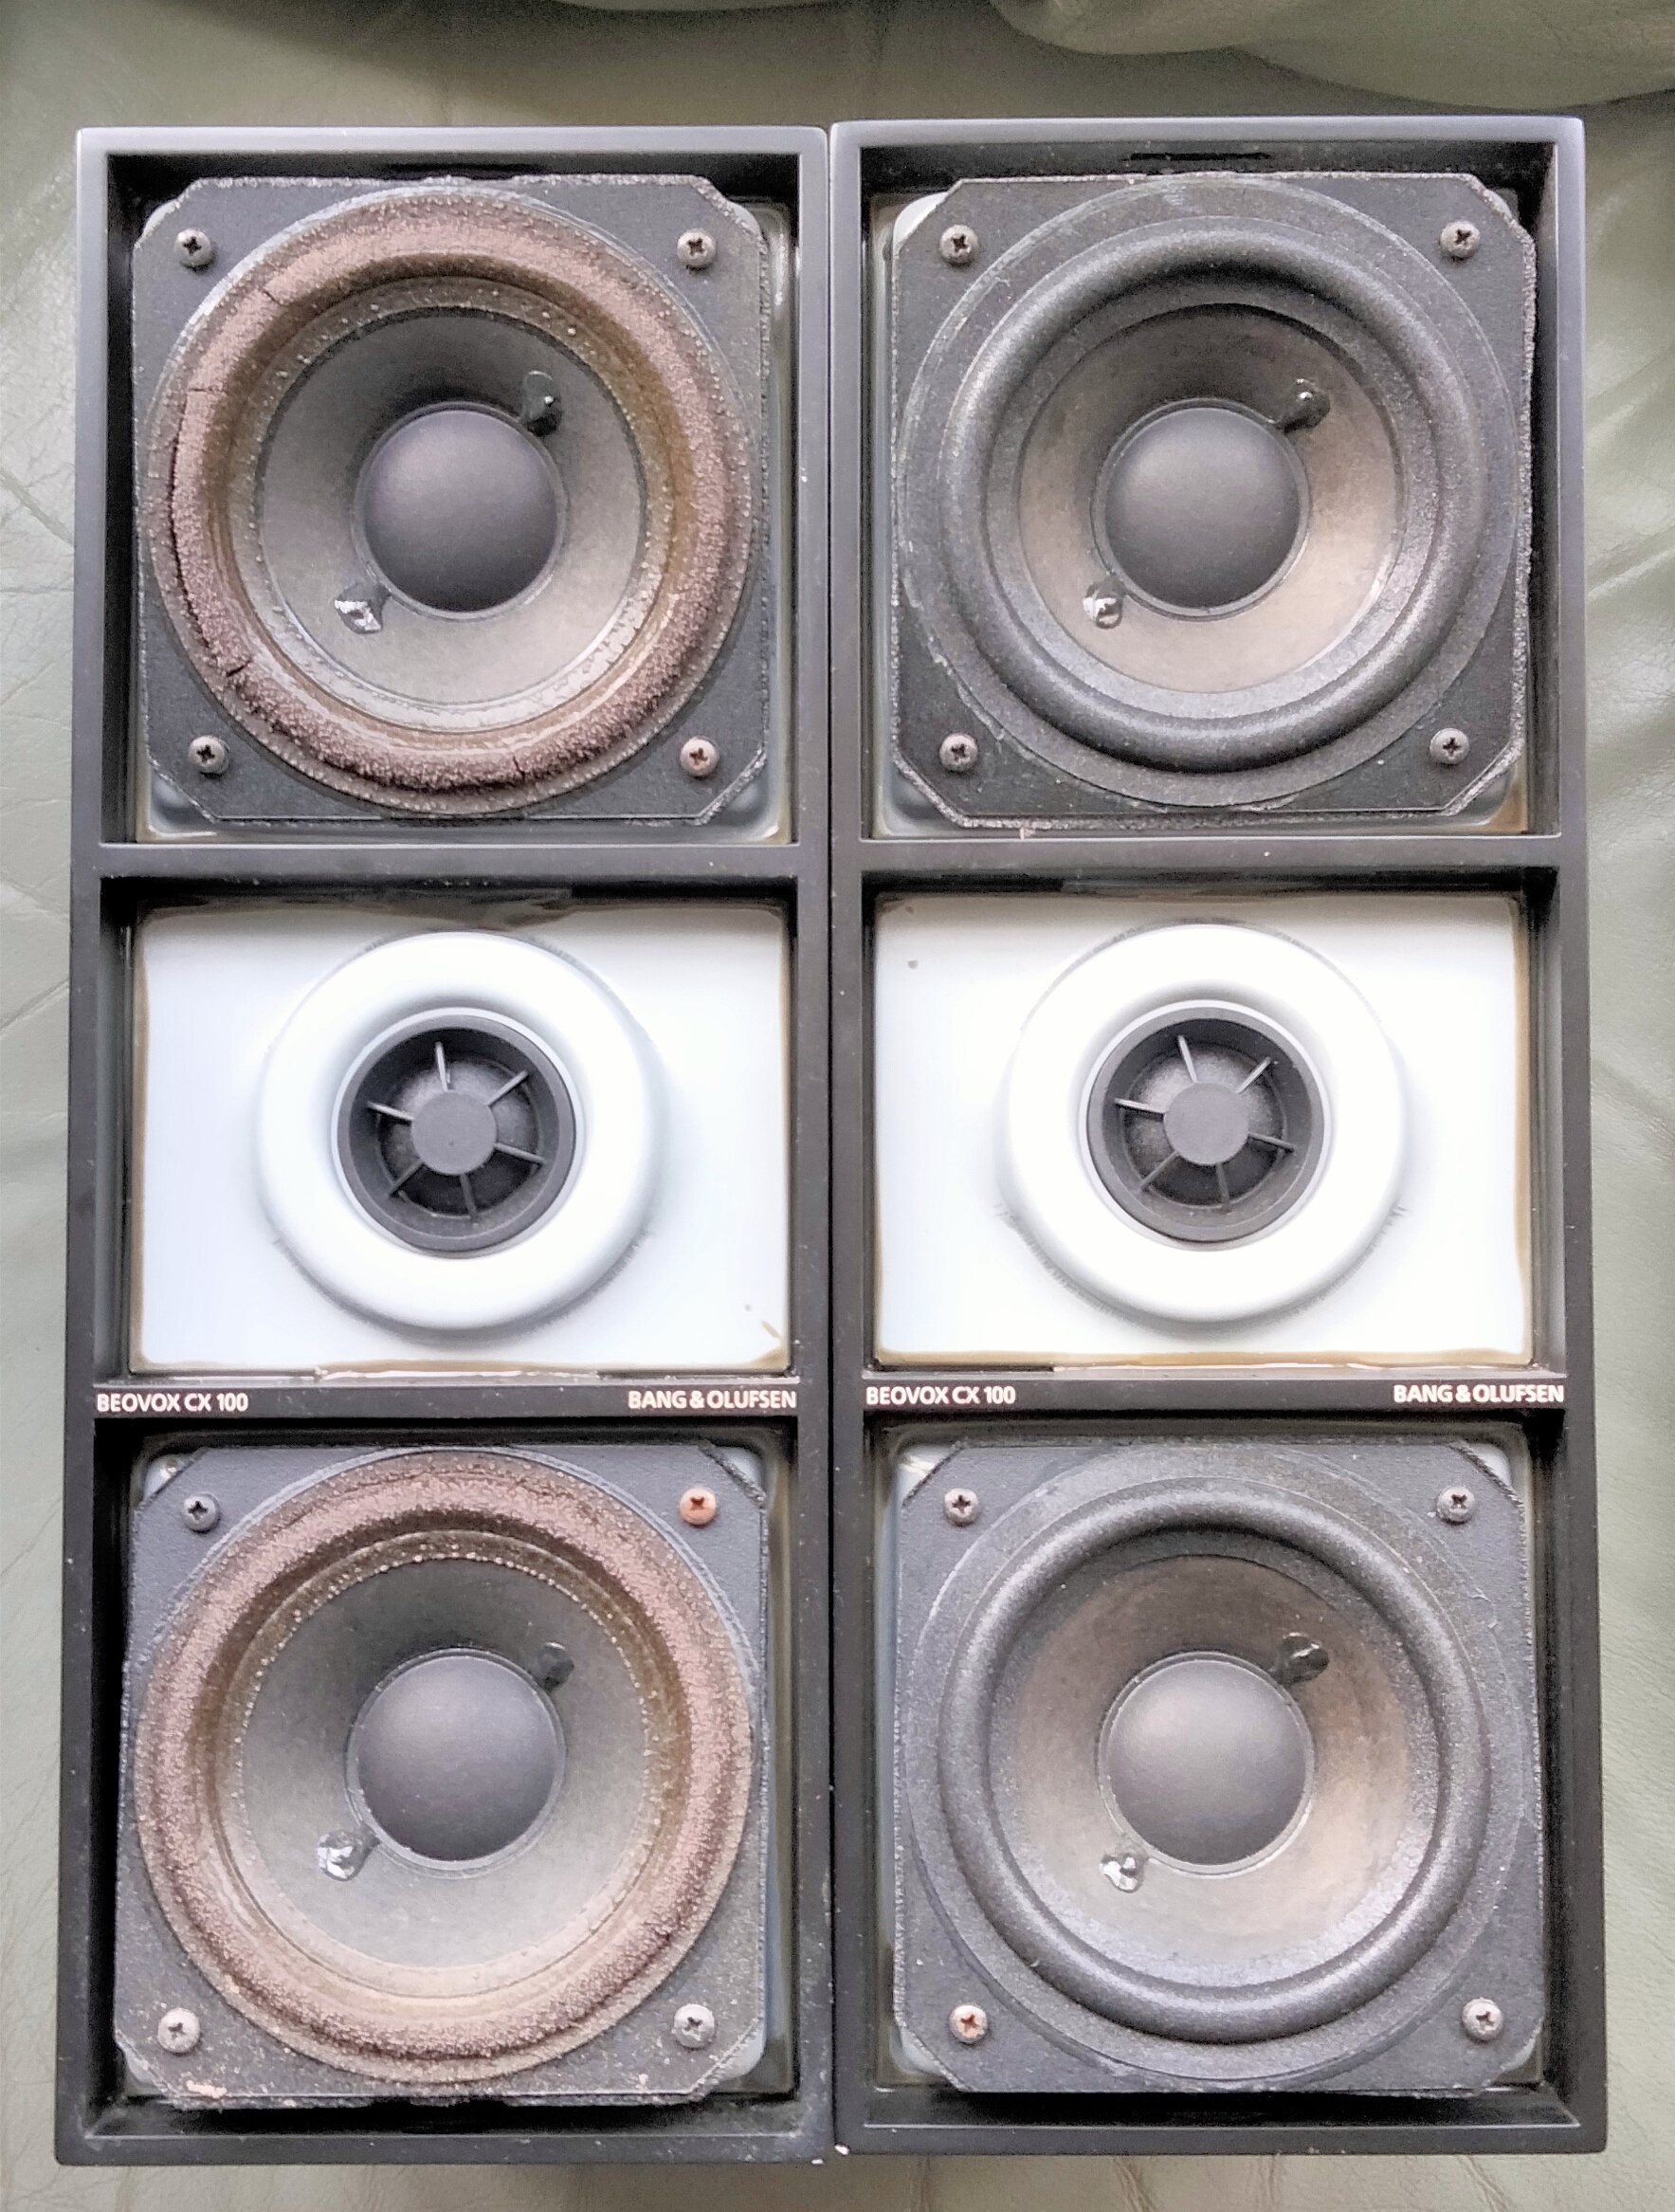
The driver surrounds are falling apart. This is a common problem with some types of old speakers. It happens because the rubber perishes over time, not due to abuse. Beovox are a speaker which is known for it. Otherwise they seem to be in great condition. I did a quick meter test to flush out any other obvious damage and found nothing amiss.
I’ve never done a speaker re-foam before. This is my opportunity to have a go and learn something. The CX 100’s are otherwise immaculate and will be very nice and quite valuable if I can fix them. I paid nothing for them so all I stand to lose, if it goes badly wrong, is the repair kit costs.
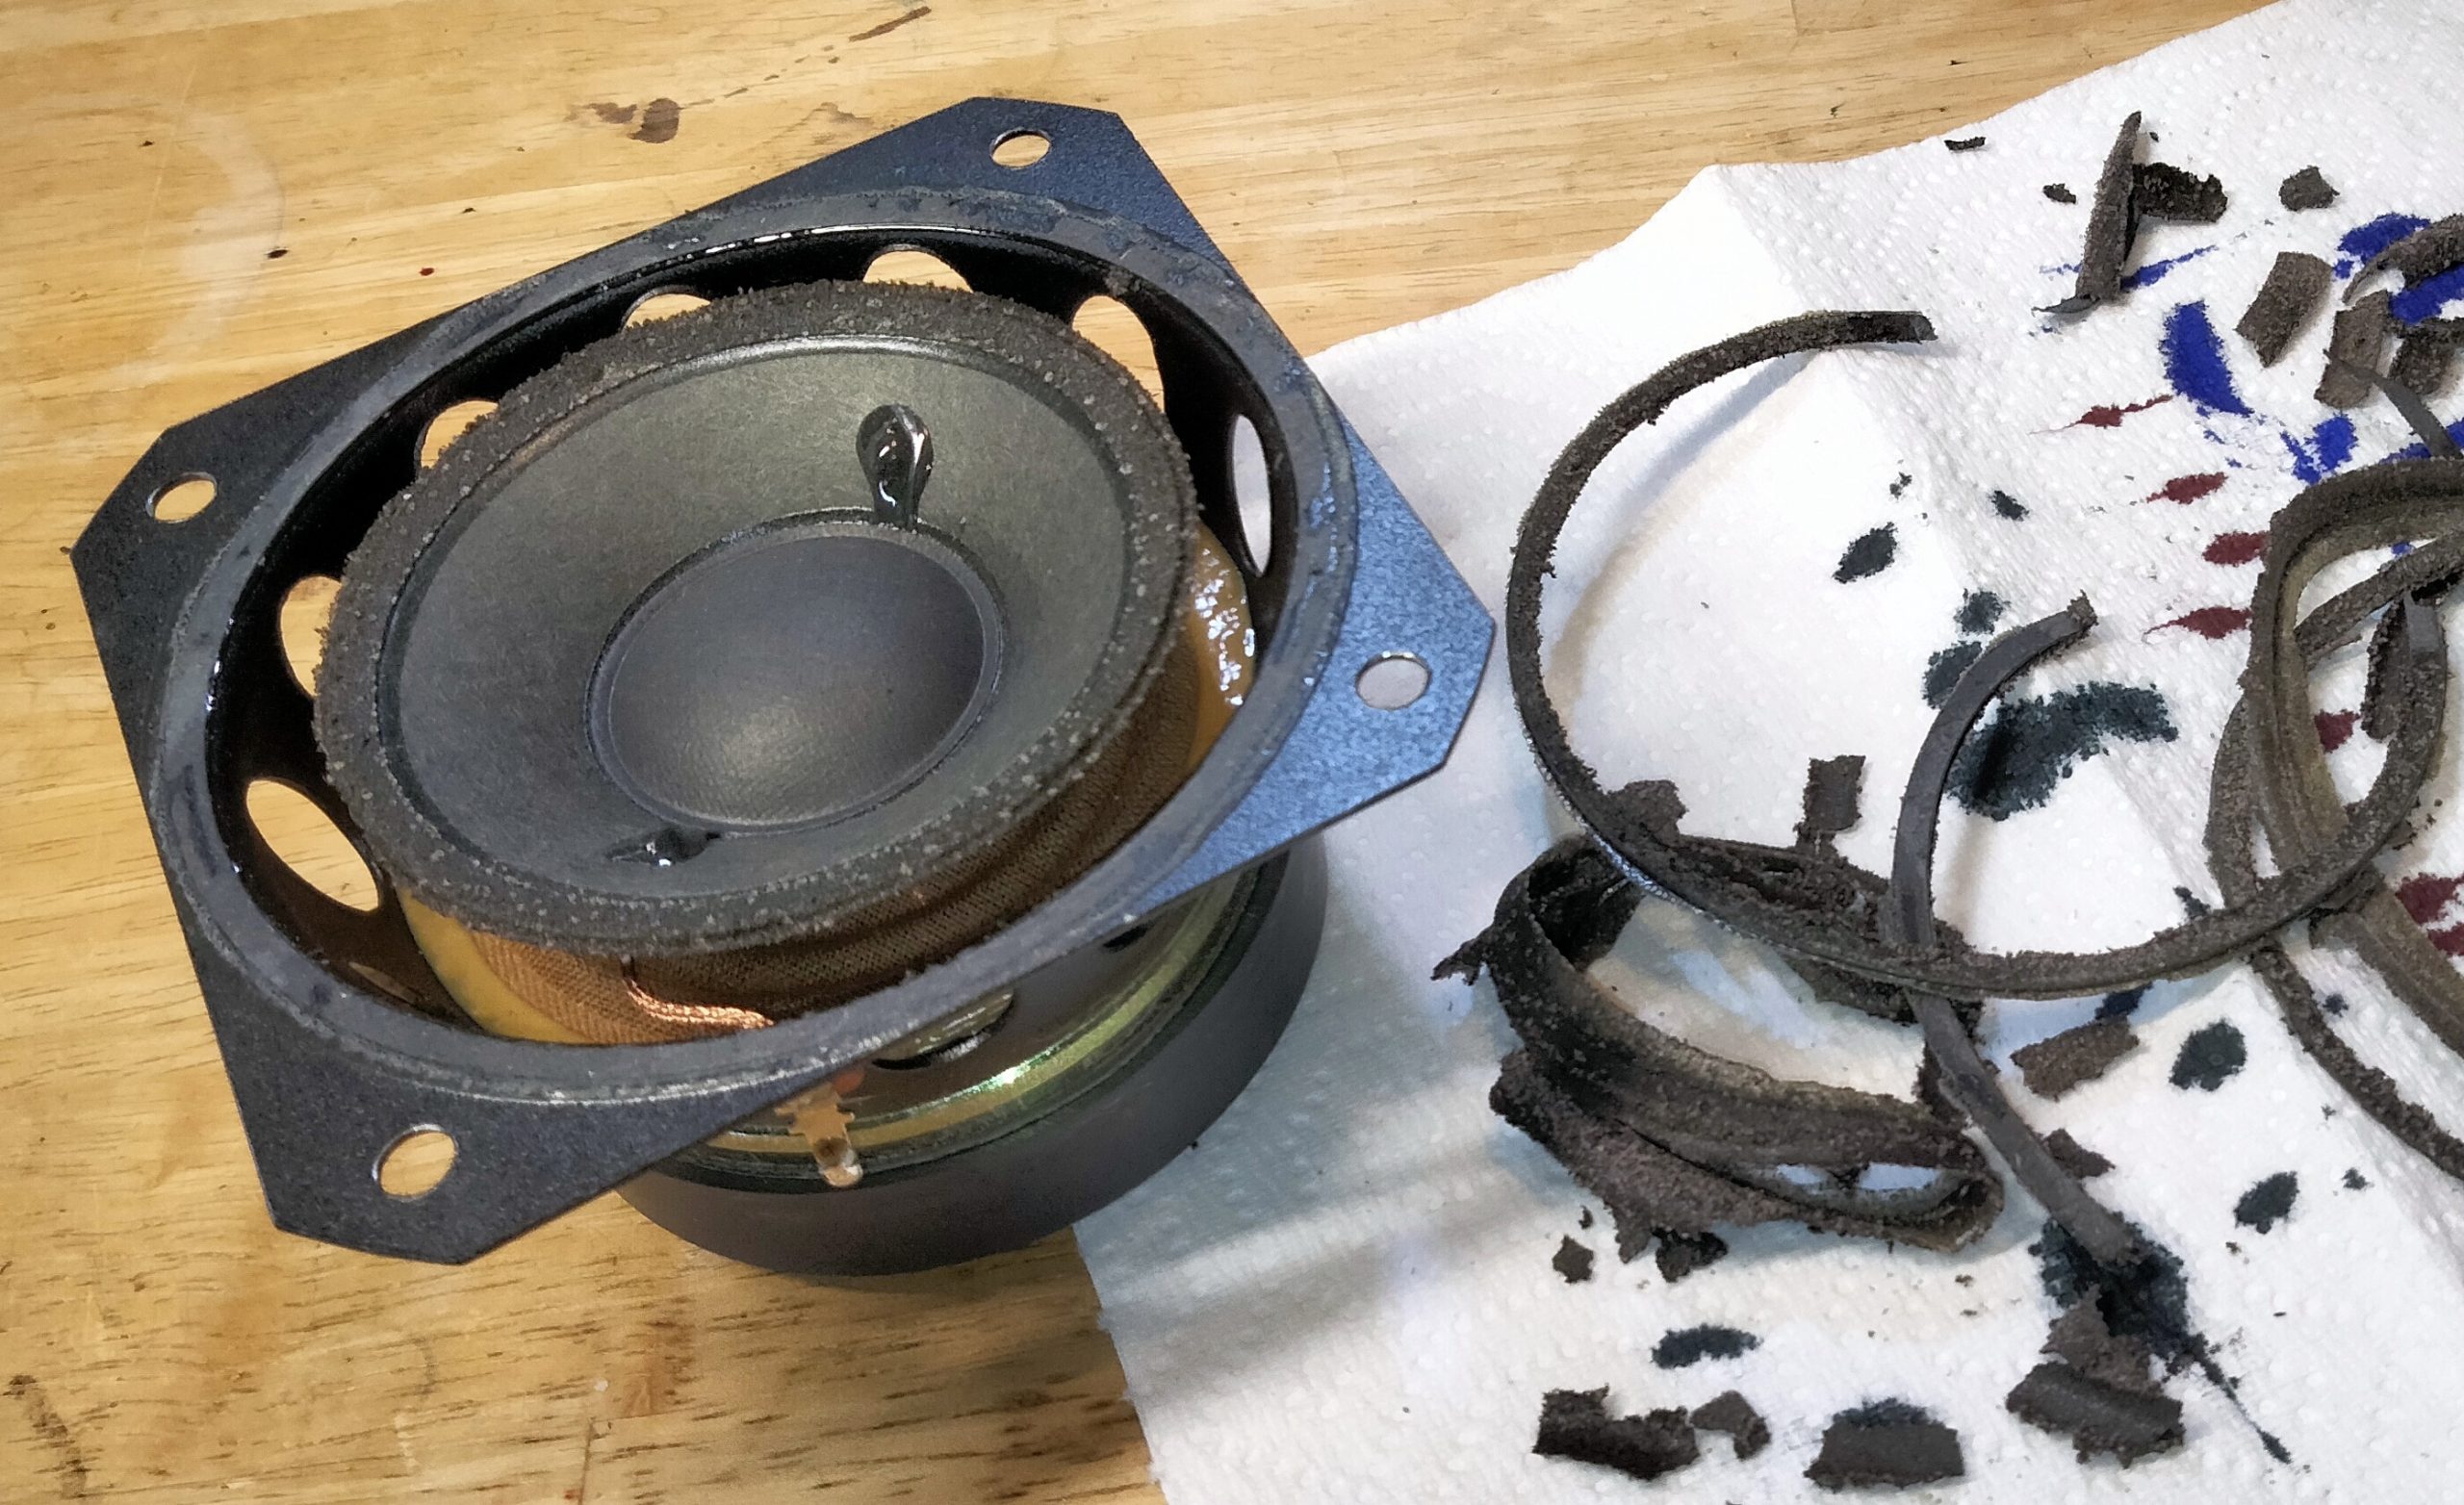
I followed the advice and instructions available on several YouTube Videos. I won’t repeat the detail here. First step was removing the old foam. This was a messy and fiddly process, as you can see.
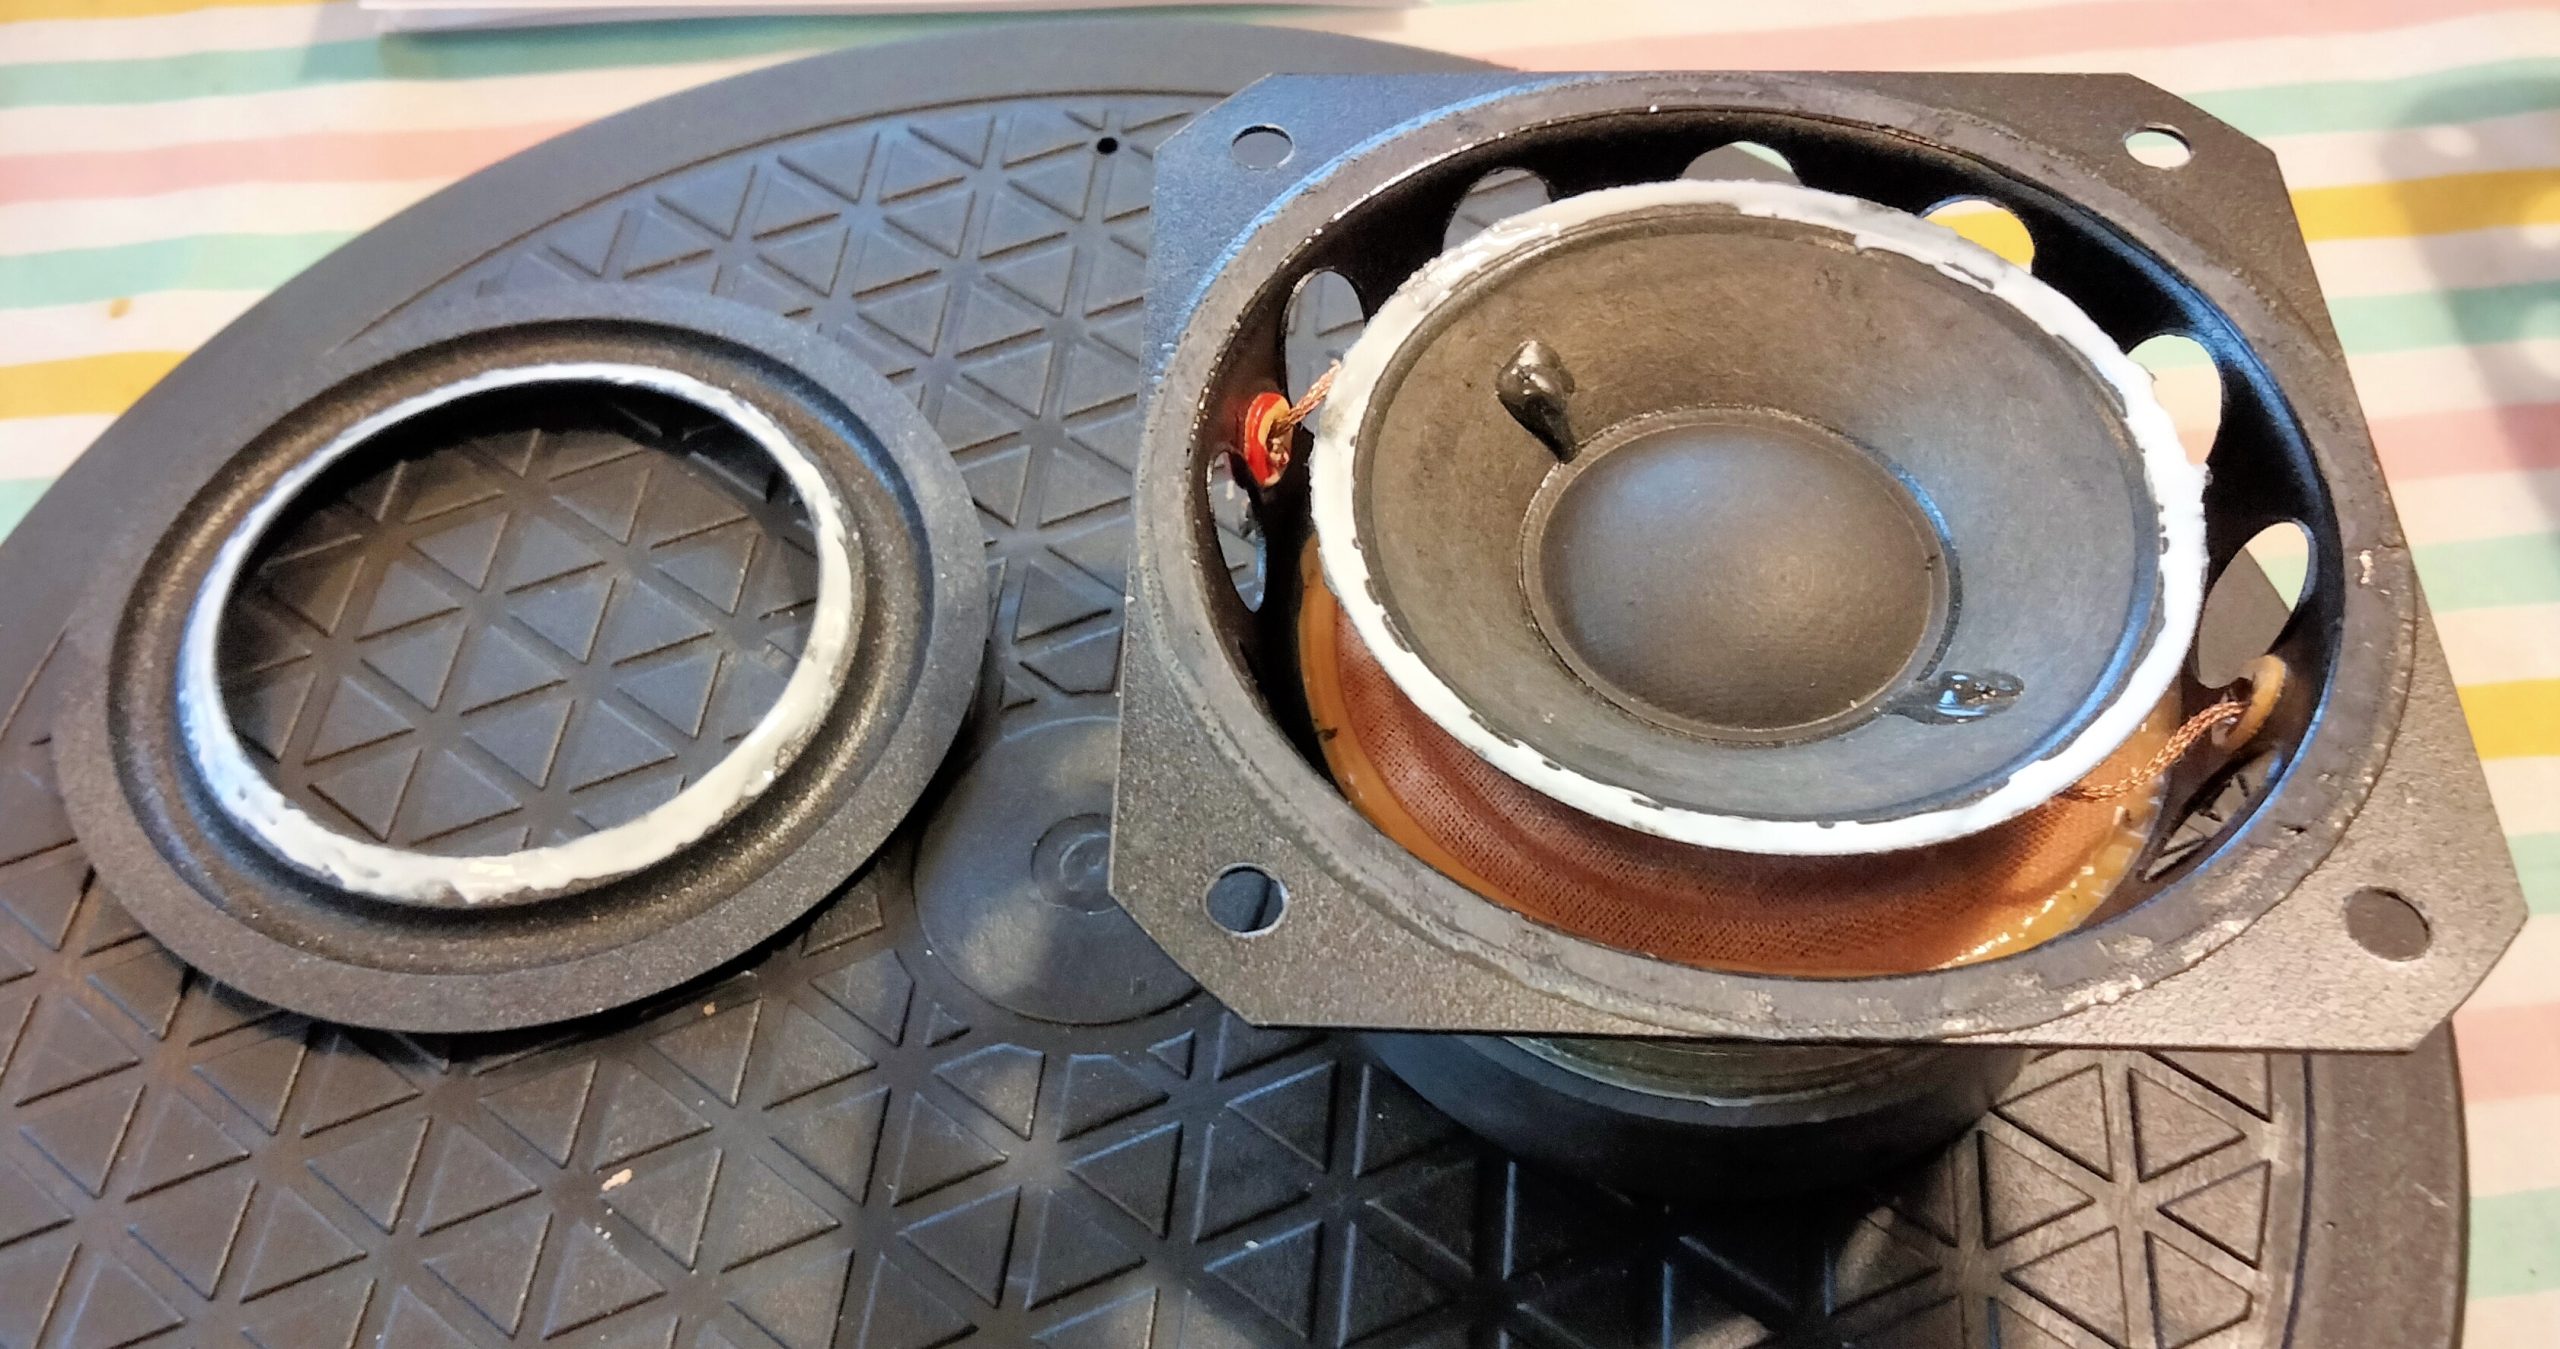
The new foam surrounds are glued on in two stages. First to the cone then, when that had dried, to the surround. This was time consuming because of the high degree of precision and care required, as well as the glue drying time. there are four drivers to do on a pair of Beovox CX 100.
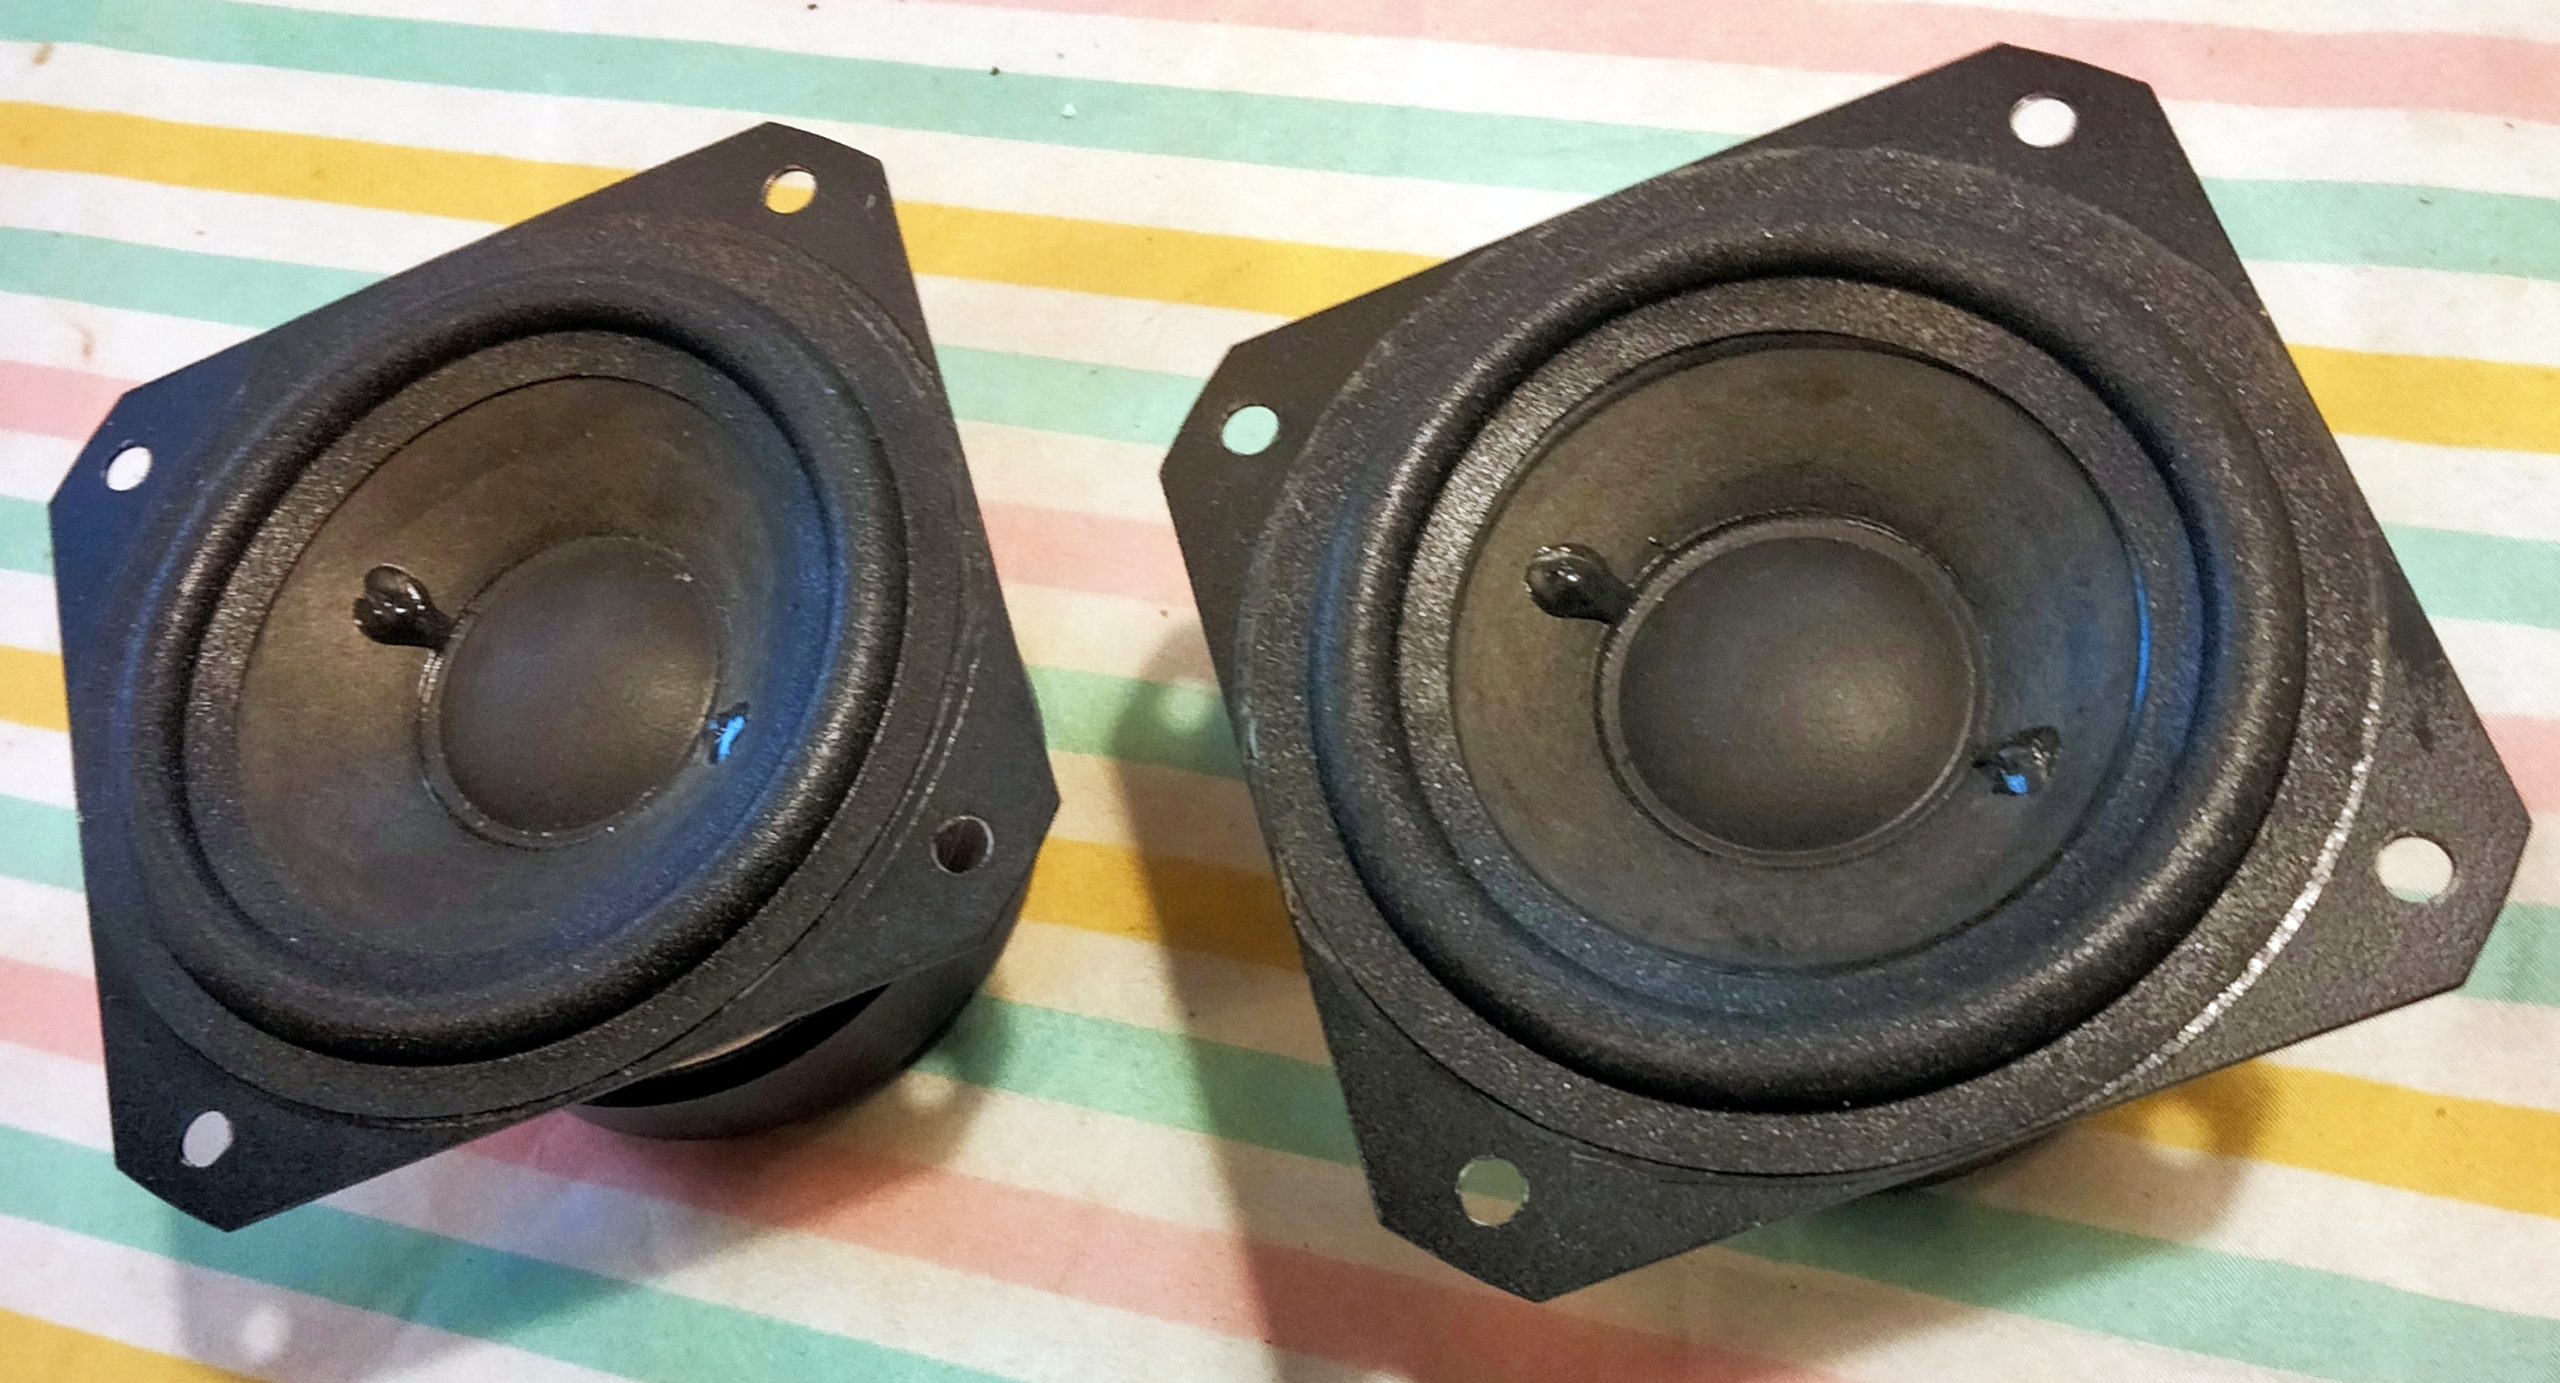
The glue dries clear, so any minor errors vanish leaving factory fresh looking results.
The visual difference between before and after is evident. So is the sound! The right speaker sounds great. The left, awful. This success showed me that re foaming is indeed straightforward and produces fantastic results. I’d better crack on with the other one then.
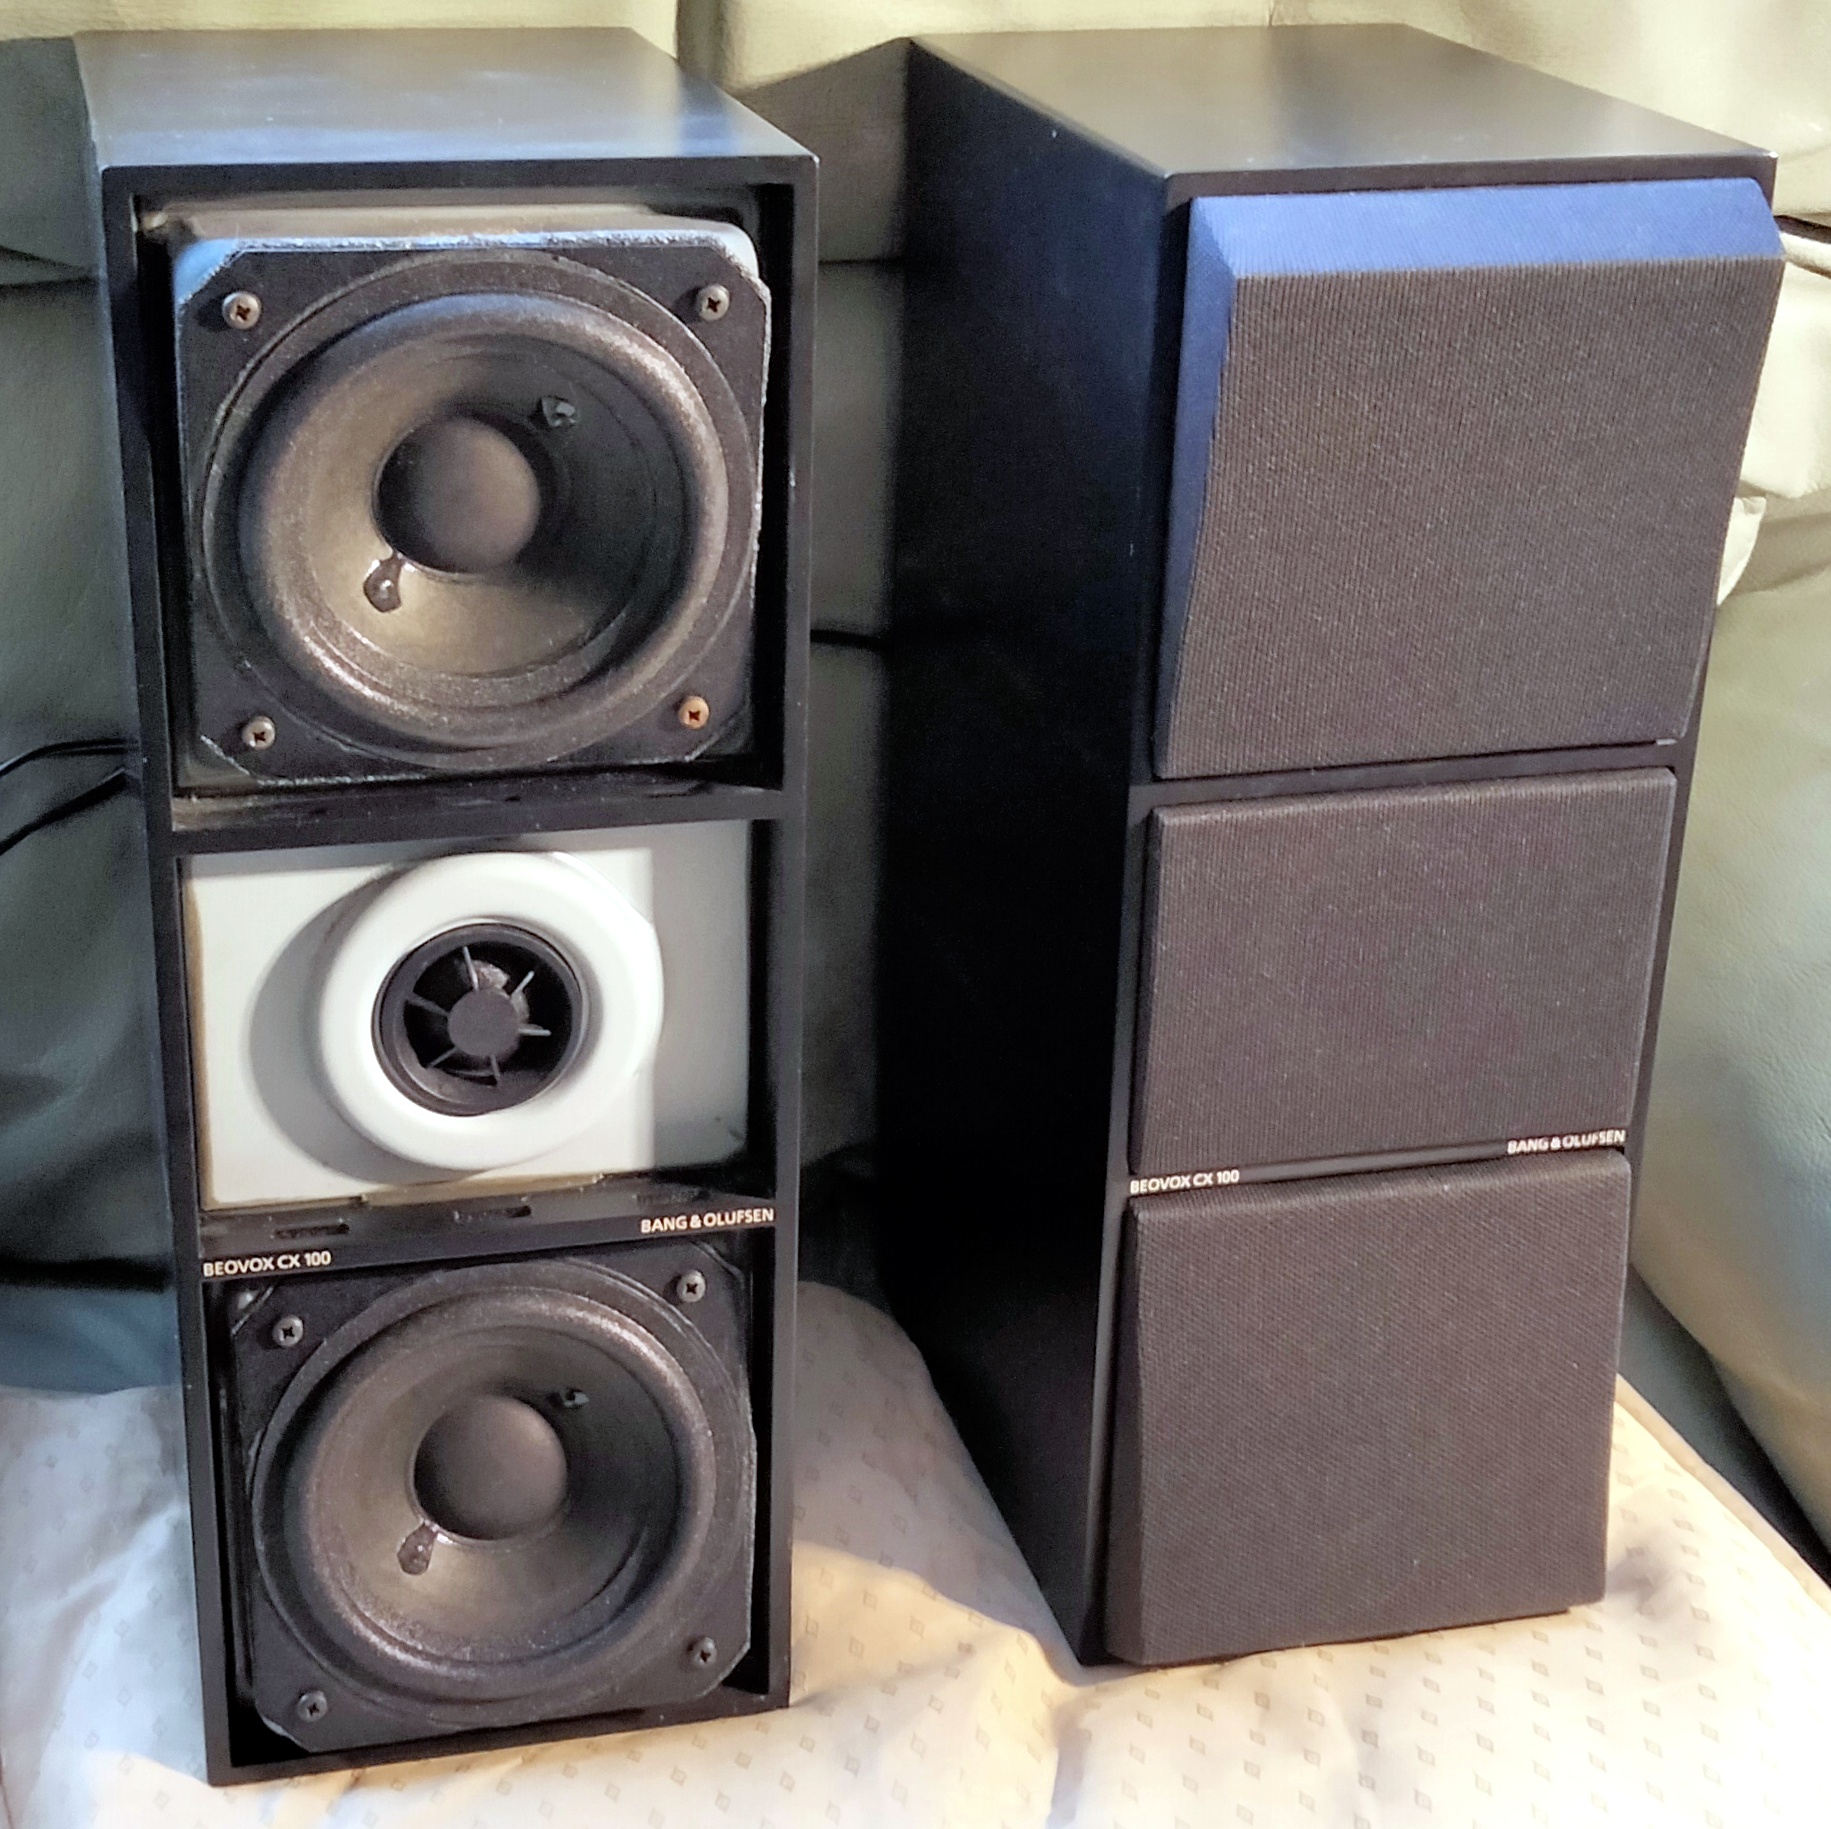
Starting with a pair of speakers which were a mess internally I invested in a cheap repair kit, some care and patience. The result is a beautiful looking and sounding set.
I’ll be wiring them up to my main stereo for a couple of wees to break them in and appreciate fully what they can do.